<?xml version="1.0" encoding="UTF-8"?>
<feed xmlns="http://www.w3.org/2005/Atom">
  <title>Tengstrand's Blog</title>
  <link href="https://tengstrand.github.io/blog/atom.xml" rel="self"/>
  <link href="https://tengstrand.github.io/blog/"/>
  <updated>2026-03-02T17:30:42+00:00</updated>
  <id>https://tengstrand.github.io/blog/</id>
  <author>
    <name>Joakim Tengstrand</name>
  </author>
  <entry>
    <id>https://tengstrand.github.io/blog/2026-02-17-tetris-playing-ai-the-polylith-way-3.html</id>
    <link href="https://tengstrand.github.io/blog/2026-02-17-tetris-playing-ai-the-polylith-way-3.html"/>
    <title>Tetris-playing AI the Polylith way - Part 3</title>
    <updated>2026-02-17T23:59:59+00:00</updated>
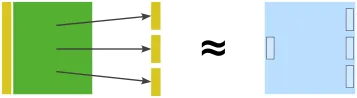
    <content type="html"><![CDATA[<div><img src="assets/07-tetris-playing-ai-the-polylith-way/rotations.png" alt="Tetris AI" style="width: 60%; max-width: 180px; height: auto; display: block; margin: 16px 0;"><p>The focus in this third part of the blog series is to implement an algorithm that computes all valid moves for a piece (<a href="https://en.wikipedia.org/wiki/Tetromino">Tetromino</a>) in its starting position. We are refining our domain model and improving the readability of parts of the codebase, while continuing to implement the code in <a href="https://clojure.org/">Clojure</a> and <a href="https://www.python.org/">Python</a>  using the component-based <a href="https://polylith.gitbook.io/polylith/">Polylith</a> architecture.</p><p>Earlier parts:</p><ul><li><a href="05-tetris-playing-ai-the-polylith-way-1.html">Part 1</a> - Places a piece on a board. Shows the differences between Clojure and Python and creates the <code>piece</code> and <code>board</code> components.</li><li><a href="06-tetris-playing-ai-the-polylith-way-2.html">Part 2</a> - Implements clearing of completed rows. Shows how to get fast feedback when working REPL-driven.</li></ul><!-- end-of-preview --><p>The resulting source code from this post:</p><ul><li>The <a href="https://github.com/tengstrand/tetrisanalyzer/tree/polylith-blog-part-03/langs/clojure/tetris-polylith">Clojure workspace</a></li><li>The <a href="https://github.com/tengstrand/tetrisanalyzer/tree/polylith-blog-part-03/langs/python/tetris-polylith-uv">Python workspace</a></li></ul><h2 id="tetris-variants">Tetris Variants</h2><p>Tetris has been made in several different variants, such as the handheld <a href="https://en.wikipedia.org/wiki/Game_Boy">Game Boy</a>, the <a href="https://en.wikipedia.org/wiki/Tetris_(NES_video_game)">Nintendo NES</a> console, and <a href="https://archive.org/details/arcade_atetris">this</a> Atari arcade game, which I played an unhealthy amount of in my younger days at a pool hall that no longer exists!</p><p>Each variant behaves slightly differently when it comes to colours, starting positions, rotation behaviour, and so on.</p><p>In most Tetris variants, the pieces start in these rotation states (lying flat) before they start falling:</p><img src="assets/07-tetris-playing-ai-the-polylith-way/pieces.png" alt="Tetris pieces" style="width: 70%; max-width: 3000px; height: auto; display: block; margin: 16px 0;"><p>Where on the board the pieces start also varies. For instance, on Nintendo NES and Atari Arcade they start in the fifth x-position, while on Game Boy they start in the fourth:</p><img src="assets/07-tetris-playing-ai-the-polylith-way/start-position.png" alt="Start position" style="width: 60%; max-width: 150px; height: auto; display: block; margin: 16px 0;"><p>In these older versions of Tetris, the pieces rotate only counterclockwise, unlike in some newer games where you can rotate both clockwise and counterclockwise.</p><p>The following table compares how pieces rotate across the three mentioned variants:</p><img src="assets/07-tetris-playing-ai-the-polylith-way/rotation-table.png" alt="Rotation table" style="width: 100%; max-width: 250px; height: auto; display: block; margin: 16px 0;"><p>On Atari, pieces are oriented toward the top-left corner (except the vertical I), while on the other two they mostly rotate around their centre.</p><p>In our code, we represent a piece as four [x y] cells:</p><pre><code class="language-clojure">[[0 1] [1 1] [2 1] [1 2]]
</code></pre><p>This representation is easy for the code to work with, but poorly communicates the shape of a piece to a human.</p><p>The main rule is that code should be written to be easy to understand for the people who read and change it (humans and AI agents).</p><p>Let us therefore define a piece like this instead:</p><pre><code class="language-clojure">(def T0 [&apos;---
         &apos;xxx
         &apos;-x-])
</code></pre><p>Python:</p><pre><code class="language-python">T0 = [
    &quot;---&quot;,
    &quot;xxx&quot;,
    &quot;-x-&quot;]
</code></pre><p>Now we can define all seven pieces and their rotation states for Game Boy (<a href="https://github.com/tengstrand/tetrisanalyzer/blob/polylith-blog-part-03/langs/python/tetris-polylith-uv/components/tetrisanalyzer/piece/settings/game_boy.py">Python code</a> is almost identical):</p><pre><code class="language-clojure">(ns tetrisanalyzer.piece.settings.game-boy
  (:require [tetrisanalyzer.piece.shape :as shape]))


(def O0 [&apos;----
         &apos;-xx-
         &apos;-xx-
         &apos;----])

(def I0 [&apos;----
         &apos;----
         &apos;xxxx
         &apos;----])

(def I1 [&apos;-x--
         &apos;-x--
         &apos;-x--
         &apos;-x--])

(def Z0 [&apos;---
         &apos;xx-
         &apos;-xx])

(def Z1 [&apos;-x-
         &apos;xx-
         &apos;x--])

(def S0 [&apos;---
         &apos;-xx
         &apos;xx-])

(def S1 [&apos;x--
         &apos;xx-
         &apos;-x-])

(def J0 [&apos;---
         &apos;xxx
         &apos;--x])

(def J1 [&apos;-xx
         &apos;-x-
         &apos;-x-])

(def J2 [&apos;x--
         &apos;xxx
         &apos;---])

(def J3 [&apos;-x-
         &apos;-x-
         &apos;xx-])

(def L0 [&apos;---
         &apos;xxx
         &apos;x--])

(def L1 [&apos;-x-
         &apos;-x-
         &apos;-xx])

(def L2 [&apos;--x
         &apos;xxx
         &apos;---])

(def L3 [&apos;xx-
         &apos;-x-
         &apos;-x-])

(def T0 [&apos;---
         &apos;xxx
         &apos;-x-])

(def T1 [&apos;-x-
         &apos;-xx
         &apos;-x-])

(def T2 [&apos;-x-
         &apos;xxx
         &apos;---])

(def T3 [&apos;-x-
         &apos;xx-
         &apos;-x-])

(def pieces [[O0]
             [I0 I1]
             [Z0 Z1]
             [S0 S1]
             [J0 J1 J2 J3]
             [L0 L1 L2 L3]
             [T0 T1 T2 T3]])

(def shapes (shape/shapes pieces))
</code></pre><p>The <a href="https://github.com/tengstrand/tetrisanalyzer/blob/26685d9ed598917105c0095ee991b1d139af37c8/langs/clojure/tetris-polylith/components/piece/src/tetrisanalyzer/piece/shape.clj#L15">shapes</a> function at the end converts the pieces into the format the code uses:</p><pre><code class="language-clojure">[;; O
 [[[1 1] [2 1] [1 2] [2 2]]]
 ;; I
 [[[0 2] [1 2] [2 2] [3 2]]
  [[1 0] [1 1] [1 2] [1 3]]]
 ;; Z
 [[[0 1] [1 1] [1 2] [2 2]]
  [[1 0] [0 1] [1 1] [0 2]]]
 ;; S
 [[[1 1] [2 1] [0 2] [1 2]]
  [[0 0] [0 1] [1 1] [1 2]]]
 ;; J
 [[[0 1] [1 1] [2 1] [2 2]]
  [[1 0] [2 0] [1 1] [1 2]]
  [[0 0] [0 1] [1 1] [2 1]]
  [[1 0] [1 1] [0 2] [1 2]]]
 ;; L
 [[[0 1] [1 1] [2 1] [0 2]]
  [[1 0] [1 1] [1 2] [2 2]]
  [[2 0] [0 1] [1 1] [2 1]]
  [[0 0] [1 0] [1 1] [1 2]]]
 ;; T
 [[[0 1] [1 1] [2 1] [1 2]]
  [[1 0] [1 1] [2 1] [1 2]]
  [[1 0] [0 1] [1 1] [2 1]]
  [[1 0] [0 1] [1 1] [1 2]]]]
</code></pre><p>The test for the <code>shape</code> function looks like this:</p><pre><code class="language-clojure">(ns tetrisanalyzer.piece.shape-test
  (:require [clojure.test :refer :all]
            [tetrisanalyzer.piece.shape :as shape]))

(deftest converts-a-piece-shape-grid-to-a-vector-of-xy-cells
  (is (= [[2 0]
          [1 1]
          [2 1]
          [1 2]]
         (shape/shape [&apos;--x-
                       &apos;-xx-
                       &apos;-x--
                       &apos;----]))))
</code></pre><p>Python:</p><pre><code class="language-python">from tetrisanalyzer.piece.shape import shape


def test_converts_a_piece_shape_grid_to_a_list_of_xy_cells():
    assert [[2, 0],
            [1, 1],
            [2, 1],
            [1, 2]] == shape([&quot;--x-&quot;,
                              &quot;-xx-&quot;,
                              &quot;-x--&quot;,
                              &quot;----&quot;]
    )
</code></pre><p>Implementation in Clojure:</p><pre><code class="language-clojure">(ns tetrisanalyzer.piece.shape)

(defn cell [x character y]
  (when (= \x character)
    [x y]))

(defn row-cells [y row]
  (keep-indexed #(cell %1 %2 y)
                (str row)))

(defn shape [piece-grid]
  (vec (mapcat identity
               (map-indexed row-cells piece-grid))))

(defn shapes [piece-grids]
  (mapv #(mapv shape %)
        piece-grids))
</code></pre><p>If you are new to Clojure, here are some explanatory examples of a couple of the functions:</p><pre><code class="language-clojure">(map-indexed vector [&quot;I&quot; &quot;love&quot; &quot;Tetris&quot;])

;; ([0 &quot;I&quot;] [1 &quot;love&quot;] [2 &quot;Tetris&quot;])
</code></pre><p>The <a href="https://clojuredocs.org/clojure.core/map-indexed">map-indexed</a> function iterates over &quot;I&quot;, &quot;love&quot;, and &quot;Tetris&quot;, and builds a new list where each element is created by calling <a href="https://clojuredocs.org/clojure.core/vector">vector</a> with the index, which is equivalent to:</p><pre><code class="language-clojure">(list (vector 0 &quot;I&quot;)
      (vector 1 &quot;love&quot;)
      (vector 2 &quot;tetris&quot;))

;; ([0 &quot;I&quot;] [1 &quot;love&quot;] [2 &quot;Tetris&quot;])
</code></pre><p>The function <a href="https://clojuredocs.org/clojure.core/keep-indexed">keep-indexed</a> works in the same way, but only keeps values that aren&apos;t nil, hence the use of <a href="https://clojuredocs.org/clojure.core/when">when</a>:</p><pre><code class="language-clojure">;; %1 = first argument (index)
;; %2 = second argument (value)
(keep-indexed #(when %2 [%1 %2]) 
              [&quot;I&quot; nil &quot;Tetris&quot;])

;; ([0 &quot;I&quot;] [2 &quot;Tetris&quot;])
</code></pre><p>Implementation in Python:</p><pre><code class="language-python">def shape(piece_grid):
    return [
        [x, y]
        for y, row in enumerate(piece_grid)
        for x, ch in enumerate(row)
        if ch == &quot;x&quot;]

def shapes(pieces_grids):
    return [
        [shape(piece_grid) for piece_grid in piece_grids]
        for piece_grids in pieces_grids]
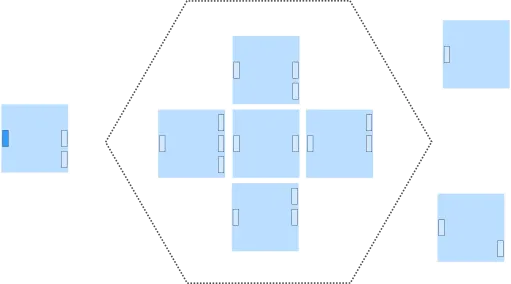
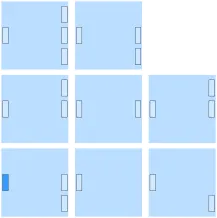
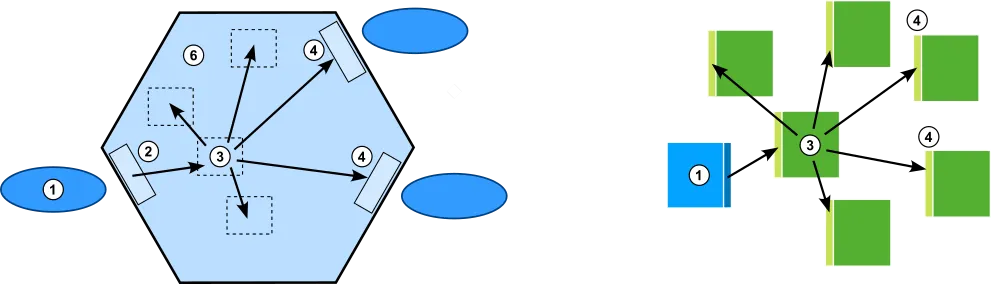
</code></pre><p>Here we use <a href="https://docs.python.org/3/tutorial/datastructures.html#list-comprehensions">list comprehension</a> to convert the data into [x, y] cells. The <a href="https://docs.python.org/3/library/functions.html#enumerate">enumerate</a> function is equivalent to Clojure’s <a href="https://clojuredocs.org/clojure.core/map-indexed">map-indexed</a>, in that it adds an index (0, 1, 2, …) to each element.</p><h2 id="domain-modelling">Domain Modelling</h2><p>The new code that calculates the valid moves for a piece in its starting position has to live somewhere. We need to be able to move and rotate a <code>piece</code>, and check whether the target position on the <code>board</code> is free.</p><p>In object-oriented programming we have several options. We could write <code>piece.set(board)</code>, <code>board.set(piece)</code>, or maybe <code>move.set(piece, board)</code>, while making every effort not to expose the internal representation.</p><p>In functional programming, we have more freedom and don&apos;t try to hide how we represent our data. The fact that the board is stored as a two-dimensional vector is no secret, and it isn’t just <code>board</code> that can create updated copies of this two-dimensional vector.</p><p>Code usually belongs where we expect to find it. We have the function <code>set-piece</code>, which, according to this reasoning, should live in <code>piece</code>, so I moved it from <code>board</code> where I&apos;d put it earlier. The new <code>placements</code> function also goes in <code>piece</code>, since it&apos;s about finding valid moves for a piece. Our domain model now looks like this:</p><img src="assets/07-tetris-playing-ai-the-polylith-way/components.png?v=3" alt="Components" style="width: 80%; max-width: 200px; height: auto; display: block; margin: 16px 0;"><p>Inside each component we list what belongs to its interface (what&apos;s public), and the arrow shows that <code>piece</code> calls functions in <code>board</code>.</p><p>We split the implementation across the namespaces <code>move</code>, <code>placement</code>, and <code>visit</code>, which we put in the <code>move</code> package:</p><pre><code class="language-shell">▾ tetris-polylith
  ▸ bases
  ▾ components
    ▸ board
    ▾ piece
      ▾ src
        ▸ settings
        ▾ move
          move.clj
          placement.clj
          visit.clj
        bitmask.clj
        interface.clj
        piece.clj
        shape.clj
      ▾ test
        ▾ move
          move_test.clj
          placement_test.clj
          visit_test.clj
        piece_test.clj
        shape_test.clj
  ▸ development
  ▸ projects
</code></pre><p>The <code>move-test</code> looks like this:</p><pre><code class="language-clojure">(ns tetrisanalyzer.piece.move.move-test
  (:require [clojure.test :refer :all]
            [tetrisanalyzer.piece.piece :as piece]
            [tetrisanalyzer.piece.move.move :as move]
            [tetrisanalyzer.piece.bitmask :as bitmask]
            [tetrisanalyzer.board.interface :as board]
            [tetrisanalyzer.piece.settings.atari-arcade :as atari-arcade]))

(def x 2)
(def y 1)
(def rotation 0)
(def S piece/S)
(def shapes atari-arcade/shapes)
(def bitmask (bitmask/rotation-bitmask shapes S))
(def piece (piece/piece S rotation shapes))

(def board (board/board [&apos;xxxxxxxx
                         &apos;xxx--xxx
                         &apos;xx--xxxx
                         &apos;xxxxxxxx]))

(deftest valid-move
  (is (= true
         (move/valid-move? board x y S rotation shapes))))

(deftest valid-left-move
  (is (= [2 1 0]
         (move/left board (inc x) y S rotation nil shapes))))

(deftest invalid-left-move
  (is (= nil
         (move/left board x y S rotation nil shapes))))

(deftest valid-right-move
  (is (= [2 1 0]
         (move/right board (dec x) y S rotation nil shapes))))

(deftest invalid-right-move
  (is (= nil
         (move/right board x (dec y) S rotation nil shapes))))

(deftest unoccupied-down-move
  (is (= [[2 1 0] nil]
         (move/down board x (dec y) S rotation nil shapes))))

(deftest down-move-hits-ground
  (is (= [nil [[2 1 0]]]
         (move/down board x y S rotation nil shapes))))

(deftest valid-rotation
  (is (= [2 1 0]
         (move/rotate board x y S (dec rotation) bitmask shapes))))

(deftest invalid-rotation-without-kick
  (is (= nil
         (move/rotate board (inc x) y S (inc rotation) bitmask shapes))))

(deftest valid-rotation-with-kick
  (is (= [2 1 0]
         (move/rotate-with-kick board (inc x) y S (inc rotation) bitmask shapes))))

(deftest invalid-move-outside-board
  (is (= false
         (move/valid-move? board 10 -10 S rotation shapes))))
</code></pre><p>The first test, <code>valid-move</code>, checks that the S piece:</p><pre><code class="language-clojure">[&apos;-xx
 &apos;xx-]
</code></pre><p>Can be placed at position x=2, y=1, on the board:</p><pre><code class="language-clojure">[&apos;xxxxxxxx
 &apos;xxx--xxx
 &apos;xx--xxxx
 &apos;xxxxxxxx]
</code></pre><p>Beyond that, we test various valid moves and rotations into the empty area, plus invalid moves outside the board.</p><p>In Tetris there&apos;s something called kick, or <a href="https://harddrop.com/wiki/Wall_kick">wall kick</a>. When you rotate a piece and that position is occupied on the board, one step left is also tried (x-1). On <a href="https://en.wikipedia.org/wiki/Nintendo_Entertainment_System">Nintendo NES</a> this is turned off, while it&apos;s enabled in the other two variants we support here. In newer Tetris games, other placements besides x-1 are sometimes tested as well.</p><p>The implementation looks like this:</p><pre><code class="language-clojure">(ns tetrisanalyzer.piece.move.move
  (:require [tetrisanalyzer.piece.piece :as piece]))

(defn cell [board x y [cx cy]]
  (or (get-in board [(+ y cy) (+ x cx)])
      piece/X))

(defn valid-move? [board x y p rotation shapes]
  (every? zero?
          (map #(cell board x y %)
               (piece/piece p rotation shapes))))

(defn left [board x y p rotation _ shapes]
  (when (valid-move? board (dec x) y p rotation shapes)
    [(dec x) y rotation]))

(defn right [board x y p rotation _ shapes]
  (when (valid-move? board (inc x) y p rotation shapes)
    [(inc x) y rotation]))

(defn down
  &quot;Returns [down-move placement] where:
   - down-move: next move when moving down or nil if blocked
   - placement: final placement if blocked, or nil if can move down&quot;
  [board x y p rotation _ shapes]
  (if (valid-move? board x (inc y) p rotation shapes)
    [[x (inc y) rotation] nil]
    [nil [[x y rotation]]]))

(defn rotate [board x y p rotation bitmask shapes]
  (let [new-rotation (bit-and (inc rotation) bitmask)]
    (when (valid-move? board x y p new-rotation shapes)
      [x y new-rotation])))

(defn rotate-with-kick [board x y p rotation bitmask shapes]
  (or (rotate board x y p rotation bitmask shapes)
      (rotate board (dec x) y p rotation bitmask shapes)))

(defn rotation-fn [rotation-kick?]
  (if rotation-kick?
    rotate-with-kick
    rotate))
</code></pre><p>The functions are fairly straightforward, so let us instead look at the code that helps us keep track of which moves have already been visited:</p><pre><code class="language-clojure">(ns tetrisanalyzer.piece.move.visit)

(defn visited? [visited-moves x y rotation]
  (if-let [visited-rotations (get-in visited-moves [y x])]
    (not (zero? (bit-and visited-rotations
                         (bit-shift-left 1 rotation))))
    true)) ;; Cells outside the board are treated as visited

(defn visit [visited-moves x y rotation]
  (assoc-in visited-moves [y x] (bit-or (get-in visited-moves [y x])
                                        (bit-shift-left 1 rotation))))
</code></pre><p>Calling the standard <a href="https://clojuredocs.org/clojure.core/bit-shift-left">bit-shift-left</a> function returns a set bit in one of the four lowest bits:</p><table><thead><tr><th style="text-align:center;">rotation</th><th style="text-align:center;">bit</th></tr></thead><tbody><tr><td style="text-align:center;">0</td><td style="text-align:center;"><code>0001</code></td></tr><tr><td style="text-align:center;">1</td><td style="text-align:center;"><code>0010</code></td></tr><tr><td style="text-align:center;">2</td><td style="text-align:center;"><code>0100</code></td></tr><tr><td style="text-align:center;">3</td><td style="text-align:center;"><code>1000</code></td></tr></tbody></table><p>These &quot;flags&quot; are used to mark that we&apos;ve visited a given [x y rotation] move on the board. Note that we pass a &quot;visited board&quot; (<code>visited-moves</code>) into <code>visit</code> and get back a copy where the [x y] cell has a bit set for the given rotation. This “copying” is very fast and memory-efficient, see “structural sharing” under <a href="https://clojure.org/reference/data_structures">Data Structures</a>.</p><p>The tests look like the following:</p><pre><code class="language-clojure">(ns tetrisanalyzer.piece.move.visit-test
  (:require [clojure.test :refer :all]
            [tetrisanalyzer.piece.move.visit :as visit]))

(def x 2)
(def y 1)
(def rotation 3)
(def unvisited [[0 0 0 0]
                [0 0 0 0]])

(deftest move-is-not-visited
  (is (= false
         (visit/visited? unvisited x y rotation))))

(deftest move-is-visited
  (let [visited (visit/visit unvisited x y rotation)]
    (is (= true
           (visit/visited? visited x y rotation)))))
</code></pre><p>Python:</p><pre><code class="language-python">from tetrisanalyzer.piece.move.visit import is_visited, visit

X = 2
Y = 1
ROTATION = 3
UNVISITED = [
    [0, 0, 0, 0],
    [0, 0, 0, 0]]


def test_move_is_not_visited():
    assert is_visited(UNVISITED, X, Y, ROTATION) is False


def test_move_is_visited():
    visited = [row[:] for row in UNVISITED]
    visit(visited, X, Y, ROTATION)
    assert is_visited(visited, X, Y, ROTATION) is True
</code></pre><p>We have now laid the groundwork to implement the <code>placements</code> function that computes all valid moves for a piece in its starting position.</p><p>We start with the test:</p><pre><code class="language-clojure">(ns tetrisanalyzer.piece.move.placement-test
  (:require [clojure.test :refer :all]
            [tetrisanalyzer.piece.piece :as piece]
            [tetrisanalyzer.piece.move.placement :as placement]
            [tetrisanalyzer.piece.settings.atari-arcade :as atari-arcade]))

(def start-x 2)
(def sorter (juxt second first last))

(def board [[0 0 0 0 0 0]
            [0 0 1 1 0 0]
            [0 0 1 0 0 1]
            [0 0 1 1 1 1]])

(def shapes atari-arcade/shapes)

;; Start position of the J piece:
;; --JJJ-
;; --xxJ-
;; --x--x
;; --xxxx
(deftest placements--without-rotation-kick
  (is (= [[2 0 0]
          [3 0 0]]
         (sort-by sorter (placement/placements board piece/J start-x false shapes)))))

;; With rotation kick, checking if x-1 fits:
;; -JJ---
;; -Jxx--
;; -Jx--x
;; --xxxx
(deftest placements--with-rotation-kick
  (is (= [[1 0 1]
          [2 0 0]
          [3 0 0]
          [0 1 1]]
         (sort-by sorter (placement/placements board piece/J start-x true shapes)))))
</code></pre><p>This tests that we get back the valid [x y rotation] positions where a piece can be placed on the board from its starting position.</p><p>The implementation:</p><pre><code class="language-clojure">(ns tetrisanalyzer.piece.move.placement
  (:require [tetrisanalyzer.piece.move.move :as move]
            [tetrisanalyzer.piece.move.visit :as visit]
            [tetrisanalyzer.board.interface :as board]
            [tetrisanalyzer.piece.bitmask :as bitmask]))

(defn -&gt;placements [board x y p rotation bitmask valid-moves visited-moves rotation-fn shapes]
  (loop [next-moves (list [x y rotation])
         placements []
         valid-moves valid-moves
         visited-moves visited-moves]
    (if-let [[x y rotation] (first next-moves)]
      (let [next-moves (rest next-moves)]
        (if (visit/visited? visited-moves x y rotation)
          (recur next-moves placements valid-moves visited-moves)
          (let [[down placement] (move/down board x y p rotation bitmask shapes)
                moves (keep #(% board x y p rotation bitmask shapes)
                            [move/left
                             move/right
                             rotation-fn
                             (constantly down)])]
            (recur (into next-moves moves)
                   (concat placements placement)
                   (conj valid-moves [x y rotation])
                   (visit/visit visited-moves x y rotation)))))
      placements)))

(defn placements [board p x kick? shapes]
  (let [y 0
        rotation 0
        bitmask (bitmask/rotation-bitmask shapes p)
        visited-moves (board/empty-board board)
        rotation-fn (move/rotation-fn kick?)]
    (if (move/valid-move? board x y p rotation shapes)
      (-&gt;placements board x y p rotation bitmask [] visited-moves rotation-fn shapes)
      [])))
</code></pre><p>Let us walk through the following section in <code>-&gt;placements</code>:</p><pre><code class="language-clojure">(loop [next-moves (list [x y rotation])
       placements []
       valid-moves valid-moves
       visited-moves visited-moves]
</code></pre><p>These four lines initialise the data we&apos;re looping over: <code>next-moves</code> is the list of moves we need to process (it grows and shrinks as we go), and <code>placements</code> accumulates valid moves.</p><p>Since Clojure doesn’t support <a href="https://en.wikipedia.org/wiki/Tail_call">tail recursion</a>, we use <a href="https://clojuredocs.org/clojure.core/loop">loop</a> instead, to avoid stack overflow on boards larger than 10×20.</p><pre><code class="language-clojure">(if-let [[x y rotation] (first next-moves)]
</code></pre><p>Retrieves the next move from <code>next-moves</code> and continues with the code immediately after, or returns <code>placements</code> (the last line in the function, representing all valid moves) if <code>next-moves</code> is empty.</p><pre><code class="language-clojure">(let [next-moves (rest next-moves)]
</code></pre><p>Drops the first element from <code>next-moves</code>, the one we just picked.</p><pre><code class="language-clojure">(if (visit/visited? visited-moves x y rotation)
</code></pre><p>If we&apos;ve already visited this move, continue with:</p><pre><code class="language-clojure">(recur next-moves placements valid-moves visited-moves)
</code></pre><p>Which continues our search for valid moves (the line after <code>(loop [...]</code>) by moving on to the next move to evaluate.</p><p>Otherwise, if the move hasn&apos;t been visited, we do:</p><pre><code class="language-clojure">(let [[down placement] (move/down board x y p rotation bitmask shapes)
     ...]
</code></pre><p>This sets <code>down</code> to the next downward move (if free) or <code>placement</code> if we can&apos;t move down, which happens when we hit the bottom or when part of the &quot;stack&quot; is in the way.</p><p>For these lines:</p><pre><code class="language-clojure">(keep #(% board x y p rotation bitmask shapes)
      [move/left
       move/right
       rotation-fn
       (constantly down)])
</code></pre><p>The <code>%</code> gets replaced with each function in the vector, which is equivalent to:</p><pre><code class="language-clojure">[(move/left board x y p rotation bitmask shapes)
 (move/right board x y p rotation bitmask shapes)
 (rotation-fn board x y p rotation bitmask shapes)
 (down board x y p rotation bitmask shapes)]
</code></pre><p>These function calls generate all possible moves (including rotations), returning [x y rotation] for positions that are free on the board, or nil if occupied. The <a href="https://clojuredocs.org/clojure.core/keep">keep</a> function filters out <code>nil</code> values, leaving only valid moves in <code>moves</code>.</p><p>Finally we execute:</p><pre><code class="language-clojure">(recur (into next-moves moves)
       (concat placements placement)
       (conj valid-moves [x y rotation])
       (visit/visit visited-moves x y rotation))
</code></pre><p>Which calls <code>loop</code> again with:</p><ul><li><code>next-moves</code> updated with any new moves</li><li><code>placements</code> updated with any valid placement</li><li><code>valid-moves</code> updated with the current move</li><li><code>visited-moves</code> with the current move marked as visited</li></ul><p>This keeps going until <code>next-moves</code> is empty, and then we return <code>placements</code>.</p><p>The function that kicks everything off and returns valid moves for a piece in its starting position:</p><pre><code class="language-clojure">(defn placements [board p x kick? shapes]
  (let [y 0
        rotation 0
        bitmask (bitmask/rotation-bitmask shapes p)
        visited-moves (board/empty-board board)
        rotation-fn (move/rotation-fn kick?)]
    (if (move/valid-move? board x y p rotation shapes)
      (-&gt;placements board x y p rotation bitmask [] visited-moves rotation-fn shapes)
      [])))
</code></pre><ul><li><code>board</code>: a two-dimensional vector representing the board, usually 10x20.</li><li><code>p</code>: piece index (0, 1, 2, 3, 4, 5, or 6).</li><li><code>x</code>: which column the 4x4 grid starts in (where the piece sits). First column is 0.</li><li><code>y</code>: set to 0 (top row for the 4x4 grid).</li><li><code>rotation</code>: set to 0 (starting rotation).</li><li><code>bitmask</code>: used when iterating over rotations so that it wraps back to 0 after reaching the maximum number of rotations it can perform.</li><li><code>visited-moves</code>: has the same structure as a board, a two-dimensional array, usually 10x20.</li><li><code>rotation-fn</code>: returns the right rotation function depending on whether kick is enabled. Also tries position x-1 if <code>kick?</code> is true.</li><li><code>shapes</code>: the shapes for all pieces and their rotation states, stored as [x y] cells.</li><li><code>(if (move/valid-move? board x y p rotation shapes)</code>: we need to check whether the initial position is free; if not, return an empty vector.</li><li><code>(-&gt;placements board x y p rotation bitmask [] visited-moves rotation-fn shapes)</code> computes the valid moves.</li></ul><p>Implementation in Python:</p><pre><code class="language-python">from collections import deque

from tetrisanalyzer import board as board_ifc
from tetrisanalyzer.piece import piece
from tetrisanalyzer.piece.bitmask import rotation_bitmask
from tetrisanalyzer.piece.move import move
from tetrisanalyzer.piece.move import visit

def _placements(board, x, y, p, rotation, bitmask, valid_moves, visited_moves, rotation_move_fn, shapes):
    next_moves = deque([[x, y, rotation]])
    valid_placements = []

    while next_moves:
        x, y, rotation = next_moves.popleft()

        if visit.is_visited(visited_moves, x, y, rotation):
            continue

        down_move, placement = move.down(board, x, y, p, rotation, bitmask, shapes)

        moves = [
            move.left(board, x, y, p, rotation, bitmask, shapes),
            move.right(board, x, y, p, rotation, bitmask, shapes),
            rotation_move_fn(board, x, y, p, rotation, bitmask, shapes),
            down_move]

        moves = [m for m in moves if m is not None]

        next_moves.extend(moves)

        if placement is not None:
            valid_placements.extend(placement)

        valid_moves.append([x, y, rotation])
        visit.visit(visited_moves, x, y, rotation)

    return valid_placements


def placements(board, p, start_x, kick, shapes):
    y = 0
    rotation = 0
    bitmask = rotation_bitmask(shapes, p)
    visited_moves = board_ifc.empty_board(board_ifc.width(board), board_ifc.height(board))
    rotation_move_fn = move.rotation_fn(kick)

    if not move.is_valid_move(board, start_x, y, p, rotation, shapes):
        return []

    return _placements(board, start_x, y, p, rotation, bitmask, [], visited_moves, rotation_move_fn, shapes)
</code></pre><p>The code follows the same algorithm as in Clojure. We use <a href="https://docs.python.org/3/library/collections.html#collections.deque">deque</a> because it&apos;s slightly faster than a list when performing both <code>popleft</code> and <code>extend</code>.</p><h2 id="testing">Testing</h2><p>Finally, we run our tests:</p><pre><code class="language-clojure">$&gt; cd ~/source/tetrisanalyzer/langs/clojure/tetris-polylith
$&gt; poly test :dev
Projects to run tests from: development

Running tests for the development project using test runner: Polylith built-in clojure.test runner...
Running tests from the development project, including 2 bricks: board, piece

Testing tetrisanalyzer.board.core-test

Ran 1 tests containing 1 assertions.
0 failures, 0 errors.

Test results: 1 passes, 0 failures, 0 errors.

Testing tetrisanalyzer.board.clear-rows-test

Ran 1 tests containing 1 assertions.
0 failures, 0 errors.

Test results: 1 passes, 0 failures, 0 errors.

Testing tetrisanalyzer.board.grid-test

Ran 2 tests containing 2 assertions.
0 failures, 0 errors.

Test results: 2 passes, 0 failures, 0 errors.

Testing tetrisanalyzer.piece.shape-test

Ran 1 tests containing 1 assertions.
0 failures, 0 errors.

Test results: 1 passes, 0 failures, 0 errors.

Testing tetrisanalyzer.piece.move.placement-test

Ran 2 tests containing 2 assertions.
0 failures, 0 errors.

Test results: 2 passes, 0 failures, 0 errors.

Testing tetrisanalyzer.piece.move.move-test

Ran 11 tests containing 11 assertions.
0 failures, 0 errors.

Test results: 11 passes, 0 failures, 0 errors.

Testing tetrisanalyzer.piece.move.visit-test

Ran 2 tests containing 2 assertions.
0 failures, 0 errors.

Test results: 2 passes, 0 failures, 0 errors.

Testing tetrisanalyzer.piece.piece-test

Ran 1 tests containing 1 assertions.
0 failures, 0 errors.

Test results: 1 passes, 0 failures, 0 errors.

Execution time: 0 seconds
</code></pre><p>Python:</p><pre><code class="language-python">$&gt; cd ~/source/tetrisanalyzer/langs/python/tetris-polylith-uv
$&gt; uv run pytest
======================================================================================================= test session starts ========================================================================================================
platform darwin -- Python 3.13.11, pytest-9.0.2, pluggy-1.6.0
rootdir: /Users/tengstrand/source/tetrisanalyzer/langs/python/tetris-polylith-uv
configfile: pyproject.toml
collected 21 items

test/components/tetrisanalyzer/board/test_clear_rows.py .                                                                                                                                                                    [  4%]
test/components/tetrisanalyzer/board/test_core.py ..                                                                                                                                                                         [ 14%]
test/components/tetrisanalyzer/board/test_grid.py ..                                                                                                                                                                         [ 23%]
test/components/tetrisanalyzer/piece/move/test_move.py ...........                                                                                                                                                           [ 76%]
test/components/tetrisanalyzer/piece/move/test_placement.py ..                                                                                                                                                               [ 85%]
test/components/tetrisanalyzer/piece/move/test_visit.py ..                                                                                                                                                                   [ 95%]
test/components/tetrisanalyzer/piece/test_shape.py .                                                                                                                                                                         [100%]

======================================================================================================== 21 passed in 0.02s ========================================================================================================
</code></pre><p>Nice, all tests passed!</p><h2 id="summary">Summary</h2><p>In this third post, I took on the not entirely trivial task of computing all valid moves for a piece in its starting position.</p><p>I avoided implementing it as a recursive algorithm, since that would limit how large our boards can get.</p><p>We reminded ourselves that code should live where we expect to find it.</p><p>We also took the opportunity to make the code easier to work with, by specifying pieces in a more readable way, and with that change we could easily support three different Tetris variants.</p><p>Hope you had just as much fun as I did 😃</p><p>Happy Coding!</p></div>]]></content>
  </entry>
  <entry>
    <id>https://tengstrand.github.io/blog/2026-01-11-tetris-playing-ai-the-polylith-way-2.html</id>
    <link href="https://tengstrand.github.io/blog/2026-01-11-tetris-playing-ai-the-polylith-way-2.html"/>
    <title>Tetris-playing AI the Polylith way - Part 2</title>
    <updated>2026-01-11T23:59:59+00:00</updated>
    <content type="html"><![CDATA[<div><img src="assets/06-tetris-playing-ai-the-polylith-way/tetris-ai.png" alt="Tetris AI" style="width: 50%; max-width: 220px; height: auto; display: block; margin: 16px 0;"><p>The focus in this second part of the blog series is to showcase the benefits of getting quick feedback when working with code. We&apos;ll do this by implementing the removal of complete rows when a Tetris piece is placed on the board.</p><!-- end-of-preview --><p>For example, if we rotate the red piece in the image above and place it in the third position, the two bottom rows should be cleared:</p><div style="display: flex; align-items: center; margin: 20px 0; max-width: 322px;">
  <img src="assets/06-tetris-playing-ai-the-polylith-way/tetris-ai-placed.png" alt="Tetris AI with piece dropped" style="width: calc(50% - 20px); height: auto; display: block;">
  <img src="assets/06-tetris-playing-ai-the-polylith-way/right-arrow.png" alt="Right arrow" style="width: 20px; height: auto; display: block; flex-shrink: 0; margin: 0 10px;">
  <img src="assets/06-tetris-playing-ai-the-polylith-way/tetris-ai-cleared.png" alt="Tetris AI with cleared rows" style="width: calc(50% - 20px); height: auto; display: block;">
</div><p>The resulting source code from this second blog post in the series can be found here:</p><ul><li>The <a href="https://github.com/tengstrand/tetrisanalyzer/tree/polylith-blog-part-02/langs/clojure/tetris-polylith">Clojure workspace</a></li><li>The <a href="https://github.com/tengstrand/tetrisanalyzer/tree/polylith-blog-part-02/langs/python/tetris-polylith-uv">Python workspace</a></li></ul><h2 id="repl-driven-development">REPL-driven development</h2><p>If you&apos;ve read <a href="05-tetris-playing-ai-the-polylith-way-1.html">part one</a> of the blog series, you already know that all code will be implemented in both Python and Clojure, so let&apos;s start with the latter!</p><p>Clojure has something called a <a href="https://clojure.org/guides/repl/introduction">REPL</a> (Read Eval Print Loop) that lets you write code in small steps, while getting quick feedback on whether the code works or not.</p><p>We&apos;ll start by creating a <code>clear-rows</code> namespace in the board component:</p><pre><code class="language-shell">▾ tetris-polylith
  ▸ bases
  ▾ components
    ▾ board
      ▾ src
        clear-rows.clj
        core.clj
        interface.clj
      ▸ test
    ▸ piece
  ▸ development
  ▸ projects
</code></pre><p>Where we add a board <code>row</code>:</p><pre><code class="language-clojure">(ns tetrisanalyzer.board.clear-rows)

(def row [1 1 1 0 1 1 1 0 1 1])
</code></pre><p>In Clojure, we only need to compile the code that has changed. Since we&apos;ve added a new namespace and a <code>row</code>, we need to send the entire namespace to the REPL, usually via a key-shortcut, to get it compiled to <a href="https://en.wikipedia.org/wiki/Java_bytecode">Java bytecode</a>.</p><p>A complete row contains no empty cells (zeros). We can use the <a href="https://clojuredocs.org/clojure.core/some">some</a> function to detect the presence of empty cells:</p><pre><code class="language-clojure">(some zero? row) ;; true
</code></pre><p>Here at least one empty cell has been found, which means the row is not complete. Let&apos;s also test whether we can identify a complete row:</p><pre><code class="language-clojure">(ns tetrisanalyzer.board.clear-rows)

(def row [1 1 1 1 1 1 1 1 1 1])

(some zero? row) ;; false
</code></pre><p>Yes, it seems to work!</p><p>Now we can create a function from the code:</p><pre><code class="language-clojure">(ns tetrisanalyzer.board.clear-rows)

(defn incomplete-row? [row]
  (some zero? row))

(comment
  (incomplete-row? [1 1 1 1 1 1 1 0 1 1]) ;; true
  (incomplete-row? [1 1 1 1 1 1 1 1 1 1]) ;; false
  #__)
</code></pre><p>Here I&apos;ve added a <a href="https://clojuredocs.org/clojure.core/comment">comment</a> block with a couple of calls to the function. From the development environment, we can now call one function at a time and immediately see the result, while the functions don&apos;t run if we reload the namespace. It&apos;s quite common in the Clojure world to leave these comment blocks in production code so that functions can be easily called, while also serving as documentation.</p><p>We&apos;ll clean up the comment block and instead add a <code>board</code> so we have something to test against (commas can be omitted):</p><pre><code class="language-clojure">(ns tetrisanalyzer.board.clear-rows)

(defn incomplete-row? [row]
  (some zero? row))

(def board [[0 0 0 0 0 0 0 0 0 0]
            [0 0 0 0 0 0 0 0 0 0]
            [1 1 1 1 1 1 1 1 1 1]
            [1 1 1 1 1 1 0 0 1 1]
            [1 0 1 1 1 1 1 1 1 1]
            [1 1 1 1 1 1 1 1 1 1]])
</code></pre><p>Now we can calculate the rows that should not be removed:</p><pre><code class="language-clojure">(def remaining-rows (filter incomplete-row? board)) ;; ([0 0 0 0 0 0 0 0 0 0]
                                                    ;;  [0 0 0 0 0 0 0 0 0 0]
                                                    ;;  [1 1 1 1 1 1 0 0 1 1] 
                                                    ;;  [1 0 1 1 1 1 1 1 1 1])
</code></pre><p>The next step is to create the two empty rows that should replace the removed ones, which we finally put in <code>empty-rows</code>:</p><pre><code class="language-clojure">(def board-width (count (first board)))
(def board-height (count board))
(def num-cleared-rows (- board-height (count remaining-rows))) ;; 2
(def empty-row (vec (repeat board-width 0))) ;; [0 0 0 0 0 0 0 0 0 0]
(def empty-rows (repeat num-cleared-rows empty-row)) ;; ([0 0 0 0 0 0 0 0 0 0] [0 0 0 0 0 0 0 0 0 0])
</code></pre><p>Here&apos;s what the board looks like after complete rows have been removed and new empty replacement rows have been added at the beginning:</p><pre><code class="language-clojure">(vec (concat empty-rows remaining-rows)) ;; [[0 0 0 0 0 0 0 0 0 0]
                                         ;;  [0 0 0 0 0 0 0 0 0 0]
                                         ;;  [0 0 0 0 0 0 0 0 0 0]
                                         ;;  [0 0 0 0 0 0 0 0 0 0]
                                         ;;  [1 1 1 1 1 1 0 0 1 1]
                                         ;;  [1 0 1 1 1 1 1 1 1 1]]
</code></pre><p>The <a href="https://clojuredocs.org/clojure.core/concat">concat</a> function combines the two lists and creates a new list with rows, while <a href="https://clojuredocs.org/clojure.core/vec">vec</a> then converts the list to a vector. Note that both <code>vec</code> and <code>concat</code> return <a href="https://clojure.org/reference/data_structures">immutable data</a>, which is standard for all data structures in Clojure.</p><h3 id="simplify">Simplify</h3><p>It occurred to me that we can simplify the code somewhat.</p><p>We&apos;ll start by making <code>empty-board</code> a bit more readable by adding <code>empty-row</code>:</p><pre><code class="language-clojure">(ns tetrisanalyzer.board.core)

(defn empty-row [width]
  (vec (repeat width 0)))

(defn empty-board [width height]
  (vec (repeat height (empty-row width))))
</code></pre><p>Then we can replace:</p><pre><code class="language-clojure">(def empty-row (vec (repeat board-width 0)))
(def empty-rows (repeat num-cleared-rows empty-row))
</code></pre><p>With:</p><pre><code class="language-clojure">(def empty-rows (core/empty-board board-width num-cleared-rows))
</code></pre><p>Now we can finally use <a href="https://clojuredocs.org/clojure.core/let">let</a> to combine the different calculation steps into a function:</p><pre><code class="language-clojure">(ns tetrisanalyzer.board.clear-rows
  (:require [tetrisanalyzer.board.core :as core]))

(defn incomplete-row? [row]
  (some zero? row))

(defn clear-rows [board]
  (let [width (count (first board))
        height (count board)
        remaining-rows (filter incomplete-row? board)
        num-cleared-rows (- height (count remaining-rows))
        empty-rows (core/empty-board width num-cleared-rows)]
    (vec (concat empty-rows remaining-rows))))
</code></pre><p>Since we&apos;ve already tested all the subexpressions, there&apos;s a good chance that the function will work as expected:</p><pre><code class="language-clojure">(clear-rows board)  ;; [[0 0 0 0 0 0 0 0 0 0]
                    ;;  [0 0 0 0 0 0 0 0 0 0]
                    ;;  [0 0 0 0 0 0 0 0 0 0]
                    ;;  [0 0 0 0 0 0 0 0 0 0]
                    ;;  [1 1 1 1 1 1 0 0 1 1]
                    ;;  [1 0 1 1 1 1 1 1 1 1]]
</code></pre><p>And indeed, it looks correct!</p><p>We&apos;ll finish by creating a test in the new namespace <code>clear-rows-test</code>:</p><pre><code class="language-shell">▾ tetris-polylith
  ▸ bases
  ▾ components
    ▸ board
      ▸ src
      ▾ test
        clear-rows-test.clj
        core-test.clj
    ▸ piece
  ▸ development
  ▸ projects
</code></pre><pre><code class="language-clojure">(ns tetrisanalyzer.board.clear-rows-test
  (:require [clojure.test :refer :all]
            [tetrisanalyzer.board.clear-rows :as sut]))

(deftest clear-two-rows
  (is (= [[0 0 0 0 0 0 0 0 0 0]
          [0 0 0 0 0 0 0 0 0 0]
          [0 0 0 0 0 0 0 0 0 0]
          [0 0 0 0 0 0 0 0 0 0]
          [1 1 1 1 1 1 0 0 1 1]
          [1 0 1 1 1 1 1 1 1 1]]
         (sut/clear-rows [[0 0 0 0 0 0 0 0 0 0]
                          [0 0 0 0 0 0 0 0 0 0]
                          [1 1 1 1 1 1 1 1 1 1]
                          [1 1 1 1 1 1 0 0 1 1]
                          [1 0 1 1 1 1 1 1 1 1]
                          [1 1 1 1 1 1 1 1 1 1]]))))
</code></pre><p>When we run the test, it shows green and we can thus move on to the Python implementation. But first, a few words about the workflow.</p><h2 id="work-faster---in-small-steps">Work faster - in small steps</h2><p>You might have noticed that we implemented the code before writing the test, and that we didn&apos;t write the entire function in one go. Instead, we introduced one small calculation step at a time, which we only put together into a complete function at the end. This allowed us to adjust the solution as our understanding grew, and we didn&apos;t need to keep everything in our heads. The brain has its limitations, so it&apos;s important that we help it along a bit!</p><p>In Clojure, only what has changed is compiled, which usually goes lightning fast. This makes you forget that it&apos;s actually a compiled language. You can open any file/namespace in the codebase, and execute a function, perhaps from an existing <a href="https://clojuredocs.org/clojure.core/comment">comment block</a>, and immediately get a response back. Gone is the feeling that something stands between you and the code, in the form of waiting for the compiler to be satisfied.</p><p>It&apos;s easy to become addicted to this immediate feedback, and the feeling is very similar to working with your hands, for example, when throwing pottery:</p><figure style="margin: 20px 0;">
  <img src="assets/06-tetris-playing-ai-the-polylith-way/pottery.png" alt="Pottery" style="width: 50%; max-width: 300px; height: auto; display: block;">
  <figcaption style="font-size: 0.75em; color: #666; margin-top: 4px; text-align: center; max-width: 300px;">Me at the pottery wheel</figcaption>
</figure><p>The contact with the clay resembles what you have when working in a REPL, an immediacy that lets you quickly test, adjust, and work toward an intended goal, in real time.</p><p>The absence of static typing means the compiler only needs to compile the small change that was just made and nothing else, which is a prerequisite for this fast workflow. Quality is achieved by testing the code often and in small steps, in combination with traditional testing and libraries like <a href="https://github.com/metosin/malli">malli</a> and <a href="https://clojure.org/guides/spec">spec</a> to validate the data.</p><p>In languages that require more extensive compilation, or lack an advanced REPL, it&apos;s very common to start by writing a test, both as a way to drive the code forward and to trigger a compilation of the code. In a language like Clojure, you can move forward in even smaller steps, in a fast and controlled way.</p><p>Enough about this, and let&apos;s switch over to Python instead!</p><h3 id="python">Python</h3><p>We&apos;ll start by trying to get as good a developer experience as possible, similar to what we have in Clojure. There are many good IDEs, but here I&apos;ll be using <a href="https://www.jetbrains.com/pycharm/">PyCharm</a>.</p><ul><li><a href="https://www.jetbrains.com/pycharm/download">Install</a> PyCharm if you haven&apos;t already.</li><li><a href="https://ipython.org/install/">Install</a> IPython, preferably globally.<ul><li>IPython is an alternative to the standard <a href="https://en.wikipedia.org/wiki/Read%E2%80%93eval%E2%80%93print_loop">REPL</a> in Python.</li></ul></li><li>Configure IPython&apos;s <a href="https://ipython.readthedocs.io/en/stable/config/intro.html">config file</a>, and add:<pre><code class="language-shell">c.InteractiveShellApp.exec_lines = [&quot;%autoreload 2&quot;]
c.InteractiveShellApp.extensions = [&quot;autoreload&quot;]
c.TerminalInteractiveShell.confirm_exit = False
</code></pre><ul><li>The config file is probably found here: <code>~/.ipython/profile_default/ipython_config.py</code></li></ul></li><li>Start PyCharm and go to <code>PyCharm &gt; Settings &gt; Python &gt; Console &gt; Python Console &gt; Starting script</code> and add:<pre><code class="language-shell">%load_ext autoreload
%autoreload 2
%aimport -pydev_umd
</code></pre><ul><li><code>%load_ext autoreload</code> loads the IPython extension <a href="https://ipython.org/ipython-doc/3/config/extensions/autoreload.html">autoreload</a>, which allows modules to be reloaded automatically when files change.</li><li><code>%autoreload 2</code> enables automatic reloading of all modules (except those that are excluded)</li><li><code>%aimport -pydev_umd</code> excludes <code>pydev_umd</code> from reloading, to remove errors that would otherwise be shown in the REPL.</li><li>There may be small red markings in the configuration, but these are not real errors and can be ignored.</li></ul></li><li>Select <code>View &gt; Tool Windows &gt; Python Console</code> from the menu, which opens a <code>Python Console</code> panel in the lower part of the IDE.<ul><li>A prompt <code>In [1]</code> should now appear instead of <code>&gt;&gt;&gt;</code>, which indicates that it&apos;s the IPython REPL running, and not the standard REPL.</li></ul></li><li>Then I set up my keyboard shortcuts under <code>Pycharm &gt; Settings... &gt; Keymap &gt; Plugins &gt; Python Community Editor</code> to be able to send code to the REPL in the same way I&apos;m used to in Clojure.</li><li>I&apos;ve also added <code>ipython&gt;=8.0.0</code> to <a href="https://github.com/tengstrand/tetrisanalyzer/blob/22af4864215aab356b5799d718a287d1c18841f3/langs/python/tetris-polylith-uv/pyproject.toml#L15">pyproject.toml</a>, and ran <code>uv sync --dev</code> to load the library.</li></ul><p>Much of what&apos;s written here comes from <a href="https://davidvujic.blogspot.com/2022/08/joyful-python-with-repl.html#easy-setup">this</a> blog post under the heading &quot;Easy setup&quot; (thanks David Vujic!).</p><p>Now it&apos;s high time to write some Python code, and we&apos;ll start by creating the module <code>clear_rows.py</code>:</p><pre><code class="language-shell">  ▾ components
    ▾ tetrisanalyzer
      ▾ board
        __init__.py
        clear_rows.py
        copy.py
      ▸ piece
  ▸ test
</code></pre><p>Then we add the row:</p><pre><code class="language-python">row = [1, 1, 1, 0, 1, 1, 1, 0, 1, 1]
</code></pre><p>After which we run the shortcut command to send the entire module to the REPL, so it gets loaded (output from the REPL):</p><pre><code class="language-python">In [1]: runfile(&apos;/Users/tengstrand/source/tetrisanalyzer/langs/python/tetris-polylith-uv/components/tetrisanalyzer/board/clear_rows.py&apos;, wdir=&apos;/Users/tengstrand/source/tetrisanalyzer/langs/python/tetris-polylith-uv/components/tetrisanalyzer/board&apos;)
</code></pre><p>Now we can select <code>row</code> in the editor and send it to the REPL:</p><pre><code class="language-python">In [2]: row
Out[2]: [1, 1, 1, 0, 1, 1, 1, 0, 1, 1]
</code></pre><p>Through the REPL, we now have a convenient way to interact with the compiled code even in Python!</p><p>Let&apos;s translate the following line from Clojure to Python:</p><pre><code class="language-clojure">(some zero? row)
</code></pre><p>By adding the following line to <code>clear_rows.py</code>:</p><pre><code class="language-python">0 in row
</code></pre><p>Now we can select the line and send it to the REPL, which is an alternative to loading the entire module:</p><pre><code class="language-python">In [3]: 0 in row
Out[3]: True
</code></pre><p>Then we change <code>row</code> and test again:</p><pre><code class="language-python">row = [1, 1, 1, 1, 1, 1, 1, 1, 1, 1]

0 in row
</code></pre><pre><code class="language-python">In [4]: 0 in row
Out[4]: False
</code></pre><p>It seems to work! Time to create a function from the code, and test run it:</p><pre><code class="language-python">def is_incomplete(row):
    return 0 in row

row = [1, 1, 1, 1, 1, 1, 1, 1, 1, 1]

is_incomplete(row)
</code></pre><pre><code class="language-python">In [5]: is_incomplete(row)
Out[5]: False
</code></pre><p>Then I update <code>row</code> and test again:</p><pre><code class="language-python">row = [1, 1, 1, 0, 1, 1, 1, 1, 1, 1]

is_incomplete(row)
</code></pre><pre><code class="language-python">In [6]: is_incomplete(row)
Out[6]: True
</code></pre><p>It looks like it works!</p><p>Now we&apos;ll add a <code>board</code> to the module, so we have something to test against:</p><pre><code class="language-python">def is_incomplete(row):
    return 0 in row


board = [[0, 0, 0, 0, 0, 0, 0, 0, 0, 0],
         [0, 0, 0, 0, 0, 0, 0, 0, 0, 0],
         [1, 1, 1, 1, 1, 1, 1, 1, 1, 1],
         [1, 1, 1, 1, 1, 1, 0, 0, 1, 1],
         [1, 0, 1, 1, 1, 1, 1, 1, 1, 1],
         [1, 1, 1, 1, 1, 1, 1, 1, 1, 1]]
</code></pre><p>In Clojure we can filter out incomplete rows like this:</p><pre><code class="language-clojure">(filter incomplete-row? board)
</code></pre><p>This is written most simply like this in Python:</p><pre><code class="language-python">[row for row in board if is_incomplete(row)]
</code></pre><p>The statement is a <a href="https://www.geeksforgeeks.org/python/python-list-comprehension/">list comprehension</a> that creates a new list by iterating over <code>board</code> and keeping only rows where <code>is_incomplete</code> returns <code>True</code>.</p><p>Let&apos;s test run the expression:</p><pre><code class="language-python">In [7]: [row for row in board if is_incomplete(row)]
Out[7]: 
[[0, 0, 0, 0, 0, 0, 0, 0, 0, 0],
 [0, 0, 0, 0, 0, 0, 0, 0, 0, 0],
 [1, 1, 1, 1, 1, 1, 0, 0, 1, 1],
 [1, 0, 1, 1, 1, 1, 1, 1, 1, 1]]
</code></pre><p>It works!</p><p>Before <code>for</code> we have <code>row</code>, which is what we iterate over:</p><pre><code class="language-python">[row for row in board if is_incomplete(row)]
</code></pre><p>Python also allows us to do a calculation for each <code>row</code>, which can be exemplified with:</p><pre><code class="language-python">[row + [9] for row in board if is_incomplete(row)]
</code></pre><p>Which adds <code>9</code> to the end of each row:</p><pre><code class="language-python">[[0, 0, 0, 0, 0, 0, 0, 0, 0, 0, 9],
 [0, 0, 0, 0, 0, 0, 0, 0, 0, 0, 9],
 [1, 1, 1, 1, 1, 1, 0, 0, 1, 1, 9],
 [1, 0, 1, 1, 1, 1, 1, 1, 1, 1, 9]]
</code></pre><p>Let&apos;s return to the original version and assign it to <code>remaining_rows</code>:</p><pre><code class="language-python">def is_incomplete(row):
    return 0 in row

board = [[0, 0, 0, 0, 0, 0, 0, 0, 0, 0],
         [0, 0, 0, 0, 0, 0, 0, 0, 0, 0],
         [1, 1, 1, 1, 1, 1, 1, 1, 1, 1],
         [1, 1, 1, 1, 1, 1, 0, 0, 1, 1],
         [1, 0, 1, 1, 1, 1, 1, 1, 1, 1],
         [1, 1, 1, 1, 1, 1, 1, 1, 1, 1]]

remaining_rows = [row for row in board if is_incomplete(row)]
</code></pre><p>Before we continue, let&apos;s do the same refactoring of <code>empty_row</code> in <code>core.py</code> as we did in Clojure:</p><pre><code class="language-python">def empty_row(width):
    return [0] * width


def empty_board(width, height):
    return [empty_row(width) for _ in range(height)]
</code></pre><p>We continue by translating this Clojure code:</p><pre><code class="language-clojure">(def width (count (first board)))
(def height (count board))
(def remaining-rows (filter incomplete-row? board))
(def num-cleared-rows (- height (count remaining-rows))) ;; 2
(def empty-rows (core/empty-board width num-cleared-rows) ;; ([0 0 0 0 0 0 0 0 0 0] [0 0 0 0 0 0 0 0 0 0])
(vec (concat empty-rows remaining-rows)) ;; [[0 0 0 0 0 0 0 0 0 0]
                                         ;;  [0 0 0 0 0 0 0 0 0 0]
                                         ;;  [0 0 0 0 0 0 0 0 0 0]
                                         ;;  [0 0 0 0 0 0 0 0 0 0]
                                         ;;  [1 1 1 1 1 1 1 0 1 1]
                                         ;;  [1 0 1 1 1 1 1 1 1 1]]
</code></pre><p>Till Python:</p><pre><code class="language-python">width = len(board[0])
height = len(board)
num_cleared_rows = height - len(remaining_rows) # 2
empty_rows = empty_board(width, num_cleared_rows) # [[0,0,0,0,0,0,0,0,0,0], [0,0,0,0,0,0,0,0,0,0]]
empty_rows + remaining_rows # [[0,0,0,0,0,0,0,0,0,0],
                            #  [0,0,0,0,0,0,0,0,0,0],
                            #  [0,0,0,0,0,0,0,0,0,0],
                            #  [0,0,0,0,0,0,0,0,0,0],
                            #  [1,1,1,1,1,1,0,0,1,1],
                            #  [1,0,1,1,1,1,1,1,1,1]]
</code></pre><p>I&apos;ve deliberately copied the functional style from Clojure to Python, and as you can see it works excellently in Python too, but with a caveat.</p><h3 id="mutability">Mutability</h3><p>At one point, part of the Clojure code looked like this:</p><pre><code class="language-clojure">(def empty-row (vec (repeat board-width 0)))
(def empty-rows (repeat num-cleared-rows empty-row)])
</code></pre><p>Which I translated to:</p><pre><code class="language-python">empty_row = [0 for _ in range(board_width)]
empty_rows = [empty_row for _ in range(num_cleared_rows)]
</code></pre><p>The problem with the Python code is that <code>empty_rows</code> refers to one and the same <code>empty_row</code>, and if the latter is changed, all rows in <code>empty_rows</code> change, which becomes a problem if <code>num_cleared_rows</code> is greater than one.</p><p>In the new solution, we instead create completely new rows in Python, while in Clojure we can share the same row since it&apos;s immutable. The fact that everything is immutable in Clojure is a big advantage when we let data flow through the system, as it prevents data from spreading uncontrollably to other parts further down in the data flow.</p><h3 id="putting-it-together">Putting it together</h3><p>Let&apos;s put everything together into a function:</p><pre><code class="language-python">from tetrisanalyzer.board.core import empty_board


def is_incomplete(row):
    return 0 in row


def clear_rows(board):
    width = len(board[0])
    height = len(board)
    remaining_rows = [row for row in board if is_incomplete(row)]
    num_cleared_rows = height - len(remaining_rows)
    empty_rows = empty_board(width, num_cleared_rows)
    return empty_rows + remaining_rows
</code></pre><p>Now we can test run it. Note that we&apos;ve removed <code>board</code> from the source file, but the REPL still remembers it from earlier:</p><pre><code class="language-python">clear_rows(board)
</code></pre><pre><code class="language-python">In [8]: clear_rows(board)
Out[8]: 
[[0, 0, 0, 0, 0, 0, 0, 0, 0, 0],
 [0, 0, 0, 0, 0, 0, 0, 0, 0, 0],
 [0, 0, 0, 0, 0, 0, 0, 0, 0, 0],
 [0, 0, 0, 0, 0, 0, 0, 0, 0, 0],
 [1, 1, 1, 1, 1, 1, 0, 0, 1, 1],
 [1, 0, 1, 1, 1, 1, 1, 1, 1, 1]]
</code></pre><p>It looks correct!</p><p>Before we add a test, we need to expose the <code>clear_rows</code> function in the <code>board</code> interface, by updating <code>components/tetrisanalyzer/board/__init__.py</code> (and sending the module to the REPL):</p><pre><code class="language-python">from tetrisanalyzer.board.clear_rows import clear_rows
from tetrisanalyzer.board.core import empty_board, set_cell, set_piece


__all__ = [&quot;empty_board&quot;, &quot;set_cell&quot;, &quot;set_piece&quot;, &quot;clear_rows&quot;]
</code></pre><p>Finally, we&apos;ll add the test <code>test_clear_rows.py</code> to the <code>board</code> component:</p><pre><code class="language-shell">  ▾ components
    ▾ tetrisanalyzer
      ▸ board
      ▸ piece
  ▾ test
    ▾ components
      ▾ tetrisanalyzer
        ▾ board
          __init__.py
          test_clear_rows.py
          test_core.py
        ▸ piece
</code></pre><pre><code class="language-python">from tetrisanalyzer import board


def test_clear_rows():
    input = [[0, 0, 0, 0, 0, 0, 0, 0, 0, 0],
             [0, 0, 0, 0, 0, 0, 0, 0, 0, 0],
             [1, 1, 1, 1, 1, 1, 1, 1, 1, 1],
             [1, 1, 1, 1, 1, 1, 0, 0, 1, 1],
             [1, 0, 1, 1, 1, 1, 1, 1, 1, 1],
             [1, 1, 1, 1, 1, 1, 1, 1, 1, 1]]
    
    expected = [[0, 0, 0, 0, 0, 0, 0, 0, 0, 0],
                [0, 0, 0, 0, 0, 0, 0, 0, 0, 0],
                [0, 0, 0, 0, 0, 0, 0, 0, 0, 0],
                [0, 0, 0, 0, 0, 0, 0, 0, 0, 0],
                [1, 1, 1, 1, 1, 1, 0, 0, 1, 1],
                [1, 0, 1, 1, 1, 1, 1, 1, 1, 1]]
    
    assert expected == board.clear_rows(input)
</code></pre><p>Now we can run all tests with <code>uv run pytest</code>:</p><pre><code class="language-shell">============================================ test session starts ============================================
platform darwin -- Python 3.13.11, pytest-9.0.2, pluggy-1.6.0
rootdir: /Users/tengstrand/source/tetrisanalyzer/langs/python/tetris-polylith-uv
configfile: pyproject.toml
collected 3 items

test/components/tetrisanalyzer/board/test_clear_rows.py .                                             [ 33%]
test/components/tetrisanalyzer/board/test_core.py ..                                                  [100%]

============================================= 3 passed in 0.01s =============================================
</code></pre><p>It works!</p><h3 id="summary">Summary</h3><p>I&apos;ve deliberately kept the Python code functional, partly to make it easier to compare with Clojure, but also because I like the simplicity of functional programming. We also learned that we needed to be careful when working with mutable data!</p><p>The key takeaway: working in smaller steps helps us move faster!</p><p>Happy Coding!</p></div>]]></content>
  </entry>
  <entry>
    <id>https://tengstrand.github.io/blog/2025-12-28-tetris-playing-ai-the-polylith-way-1.html</id>
    <link href="https://tengstrand.github.io/blog/2025-12-28-tetris-playing-ai-the-polylith-way-1.html"/>
    <title>Tetris-playing AI the Polylith way - Part 1</title>
    <updated>2025-12-28T23:59:59+00:00</updated>
    <content type="html"><![CDATA[<div><img src="assets/05-tetris-playing-ai-the-polylith-way/tetris-ai.png" alt="Tetris AI" style="width: 50%; max-width: 220px; height: auto; display: block; margin: 16px 0;"><p>In this blog series, I will show how to work with the <a href="(https://polylith.gitbook.io/polylith/)">Polylith</a> architecture and how organizing code into components helps create a good structure for high-level functional style programming.</p><p>You might feel that organizing into components is unnecessary, and yes, for a tiny codebase like this I would agree. It&apos;s still easy to reason about the code and keep everything in mind, but as the codebase grows, so does the value of this structure, in terms of better overview, clearer system boundaries, and increased flexibility in how these building blocks can be combined into various systems.</p><p>We will get familiar with this by implementing a self-playing <a href="https://en.wikipedia.org/wiki/Tetris">Tetris</a> program in <a href="https://en.wikipedia.org/wiki/Clojure">Clojure</a> and <a href="https://en.wikipedia.org/wiki/Python_(programming_language)">Python</a> while reflecting on the differences between the two languages.</p><!-- end-of-preview --><h2 id="the-goal">The goal</h2><p>The task for this first post is to place a <code>T</code> piece on a Tetris board (represented by a two-dimensional array):</p><pre><code class="language-clojure">[[0,0,0,0,0,0,0,0,0,0]
 [0,0,0,0,0,0,0,0,0,0]
 [0,0,0,0,0,0,0,0,0,0]
 [0,0,0,0,0,0,0,0,0,0]
 [0,0,0,0,0,0,0,0,0,0]
 [0,0,0,0,0,0,0,0,0,0]
 [0,0,0,0,0,0,0,0,0,0]
 [0,0,0,0,0,0,0,0,0,0]
 [0,0,0,0,0,0,0,0,0,0]
 [0,0,0,0,0,0,0,0,0,0]
 [0,0,0,0,0,0,0,0,0,0]
 [0,0,0,0,0,0,0,0,0,0]
 [0,0,0,0,0,0,0,0,0,0]
 [0,0,0,0,0,0,T,0,0,0]
 [0,0,0,0,0,T,T,T,0,0]]
</code></pre><p>We will put the code in the <code>piece</code> and <code>board</code> components in a Polylith <a href="https://cljdoc.org/d/polylith/clj-poly/CURRENT/doc/workspace">workspace</a> (output from the <a href="https://cljdoc.org/d/polylith/clj-poly/0.3.31/doc/reference/commands#info">info</a> command):</p><img src="assets/05-tetris-playing-ai-the-polylith-way/poly-info.png" alt="Poly info output" style="width: 60%; max-width: 250px; height: auto; display: block; margin: 10px 0;"><p>This will not be a complete guide to Polylith, Clojure, or Python, but I will explain the most important parts and refer to relevant documentation when needed.</p><p>The resulting source code from this first blog post in the series can be found here:</p><ul><li>The <a href="https://github.com/tengstrand/tetrisanalyzer/tree/polylith-blog-part-01/langs/clojure/tetris-polylith">Clojure workspace</a></li><li>The <a href="https://github.com/tengstrand/tetrisanalyzer/tree/polylith-blog-part-01/langs/python/tetris-polylith-uv">Python workspace</a></li></ul><h2 id="workspace">Workspace</h2><p>We begin by installing the <a href="https://cljdoc.org/d/polylith/clj-poly/0.3.31/doc/readme">poly</a> command line tool for Clojure, which we will use when working with the Polylith codebase:</p><pre><code class="language-shell">brew install polyfy/polylith/poly
</code></pre><p>The next step is to create a Polylith <a href="https://cljdoc.org/d/polylith/clj-poly/0.2.22/doc/workspace">workspace</a>:</p><pre><code class="language-shell">poly create workspace name:tetris-polylith top-ns:tetrisanalyzer
</code></pre><p>We now have a standard Polylith workspace for Clojure in place:</p><pre><code class="language-shell">▾ tetris-polylith
  ▸ bases
  ▸ components
  ▸ development
  ▸ projects
  deps.edn
  workspace.edn
</code></pre><h4 id="python">Python</h4><p>We will use <a href="https://github.com/astral-sh/uv">uv</a> as package manager for Python (see <a href="https://davidvujic.github.io/python-polylith-docs/setup">setup</a> for other alternatives). First we <a href="https://github.com/astral-sh/uv?tab=readme-ov-file#installation">install uv</a>:</p><pre><code class="language-shell">curl -LsSf https://astral.sh/uv/install.sh | sh
</code></pre><p>Then we create the <code>tetris-polylith-uv</code> workspace directory, by executing:</p><pre><code class="language-shell">uv init tetris-polylith-uv
cd tetris-polylith-uv
uv add polylith-cli --dev
uv sync
</code></pre><p>which creates:</p><pre><code class="language-shell">README.md
main.py
pyproject.toml
uv.lock
</code></pre><p>Finally we create the standard Polylith workspace structure:</p><pre><code class="language-shell">uv run poly create workspace --name tetrisanalyzer --theme loose
</code></pre><p>which adds:</p><pre><code class="language-shell">▾ tetris-polylith-uv
  ▸ bases
  ▸ components
  ▸ development
  ▸ projects
  workspace.toml
</code></pre><p>The workspace requires some additional manual steps, documented <a href="https://davidvujic.github.io/python-polylith-docs/setup/#uv">here</a>.</p><h2 id="the-piece-component">The piece component</h2><p>Now we are ready to create our first component for the Clojure codebase:</p><pre><code class="language-shell">poly create component name:piece
</code></pre><p>This adds the <code>piece</code> component to the workspace structure:</p><pre><code class="language-shell">  ▾ components
    ▾ piece
      ▾ src
        ▾ tetrisanalyzer
          ▾ piece
            interface.clj
            core.clj
      ▾ test
        ▾ tetrisanalyzer
          ▾ piece
            interface-test.clj
</code></pre><p>If you have used Polylith with Clojure before, you know that you also need to manually add <code>piece</code> to <a href="https://github.com/tengstrand/tetrisanalyzer/blob/polylith-blog-part-01/langs/clojure/tetris-polylith/deps.edn">deps.edn</a>, which is described <a href="https://cljdoc.org/d/polylith/clj-poly/0.3.31/doc/component#create-component">here</a>.</p><h4 id="python-2">Python</h4><p>Let&apos;s do the same for Python:</p><pre><code class="language-shell">uv run poly create component --name piece
</code></pre><p>This adds the <code>piece</code> component to the structure:</p><pre><code class="language-shell">  ▾ components
    ▾ tetrisanalyzer
      ▾ piece
        __init__.py
        core.py
  ▾ test
    ▾ components
      ▾ tetrisanalyzer
        ▾ piece
          __init__.py
          test_core.py
</code></pre><h4 id="piece-shapes">Piece shapes</h4><p>In Tetris, there are 7 different pieces that can be rotated, summing up to 19 shapes:</p><img src="assets/05-tetris-playing-ai-the-polylith-way/pieces.png" alt="Pieces" style="width: 100%; max-width: 500px; height: auto; display: block; margin: 20px 0;"><p>Here we will store them in a multi-dimensional array where each possible piece shape is made up of four <code>[x,y]</code> cells, with <code>[0,0]</code> representing the upper left corner.</p><p>For example the <code>Z</code> piece in its inital position (rotation 0) consists of the cells <code>[0,0] [1,0] [1,1] [2,1]</code>:</p><img src="assets/05-tetris-playing-ai-the-polylith-way/z-piece.png" alt="Z piece" style="width: 100%; max-width: 100px; height: auto; display: block; margin: 20px 0;"><p>This is how it looks like in Clojure (commas are treated as white spaces in Clojure and are often omitted):</p><pre><code class="language-clojure">(ns tetrisanalyzer.piece.piece)

(def pieces [nil

             ;; I (1)
             [[[0 0] [1 0] [2 0] [3 0]]
              [[0 0] [0 1] [0 2] [0 3]]]

             ;; Z (2)
             [[[0 0] [1 0] [1 1] [2 1]]
              [[1 0] [0 1] [1 1] [0 2]]]

             ;; S (3)
             [[[1 0] [2 0] [0 1] [1 1]]
              [[0 0] [0 1] [1 1] [1 2]]]

             ;; J (4)
             [[[0 0] [1 0] [2 0] [2 1]]
              [[0 0] [1 0] [0 1] [0 2]]
              [[0 0] [0 1] [1 1] [2 1]]
              [[1 0] [1 1] [0 2] [1 2]]]

             ;; L (5)
             [[[0 0] [1 0] [2 0] [0 1]]
              [[0 0] [0 1] [0 2] [1 2]]
              [[2 0] [0 1] [1 1] [2 1]]
              [[0 0] [1 0] [1 1] [1 2]]]

             ;; T (6)
             [[[0 0] [1 0] [2 0] [1 1]]
              [[0 0] [0 1] [1 1] [0 2]]
              [[1 0] [0 1] [1 1] [2 1]]
              [[1 0] [0 1] [1 1] [1 2]]]

             ;; O (7)
             [[[0 0] [1 0] [0 1] [1 1]]]])
</code></pre><h4 id="python-3">Python</h4><p>Here is how it looks in Python:</p><pre><code class="language-python">pieces = [None,

          # I (1)
          [[[0, 0], [1, 0], [2, 0], [3, 0]],
           [[0, 0], [0, 1], [0, 2], [0, 3]]],

          # Z (2)
          [[[0, 0], [1, 0], [1, 1], [2, 1]],
           [[1, 0], [0, 1], [1, 1], [0, 2]]],

          # S (3)
          [[[1, 0], [2, 0], [0, 1], [1, 1]],
           [[0, 0], [0, 1], [1, 1], [1, 2]]],

          # J (4)
          [[[0, 0], [1, 0], [2, 0], [2, 1]],
           [[0, 0], [1, 0], [0, 1], [0, 2]],
           [[0, 0], [0, 1], [1, 1], [2, 1]],
           [[1, 0], [1, 1], [0, 2], [1, 2]]],

          # L (5)
          [[[0, 0], [1, 0], [2, 0], [0, 1]],
           [[0, 0], [0, 1], [0, 2], [1, 2]],
           [[2, 0], [0, 1], [1, 1], [2, 1]],
           [[0, 0], [1, 0], [1, 1], [1, 2]]],

          # T (6)
          [[[0, 0], [1, 0], [2, 0], [1, 1]],
           [[0, 0], [0, 1], [1, 1], [0, 2]],
           [[1, 0], [0, 1], [1, 1], [2, 1]],
           [[1, 0], [0, 1], [1, 1], [1, 2]]],

          # O (7)
          [[[0, 0], [1, 0], [0, 1], [1, 1]]]]
</code></pre><p>In Clojure we had to specify the namespace at the top of the file, but in Python, the namespace is implicitly given based on the directory hierarchy.</p><p>Here we put the above code in <code>shape.py</code>, and it will therefore automatically belong to the <code>tetrisanalyzer.piece.shape</code> module:</p><pre><code class="language-shell">▾ tetris-polylith-uv
  ▾ components
    ▾ tetrisanalyzer
      ▾ piece
        __init__.py
        shape.py
</code></pre><h4 id="interface">Interface</h4><p>In Polylith, only what&apos;s in the component&apos;s <a href="https://cljdoc.org/d/polylith/clj-poly/0.3.31/doc/interface">interface</a> is exposed to the rest of the codebase.</p><p>In Python, we can optionally control what gets exposed in wildcard imports (<code>from module import *</code>) by defining the <code>__all__</code> variable in the <code>__init__.py</code> module. However, even without <code>__all__</code>, all public names (those not starting with <code>_</code>) are still accessible through explicit imports.</p><p>This is how the <code>piece</code> interface in <code>__init__.py</code> looks like:</p><pre><code class="language-python">from tetrisanalyzer.piece.core import I, Z, S, J, L, T, O, piece

__all__ = [&quot;I&quot;, &quot;Z&quot;, &quot;S&quot;, &quot;J&quot;, &quot;L&quot;, &quot;T&quot;, &quot;O&quot;, &quot;piece&quot;]
</code></pre><p>We could have put all the code directly in <code>__init__.py</code>, but it&apos;s a common pattern in Python to keep this module clean by delegating to implementation modules like <code>core.py</code>:</p><pre><code class="language-python">from tetrisanalyzer.piece import shape

I = 1
Z = 2
S = 3
J = 4
L = 5
T = 6
O = 7


def piece(p, rotation):
    return shape.pieces[p][rotation]
</code></pre><p>The <code>piece</code> component now has these files:</p><pre><code class="language-shell">▾ tetris-polylith-uv
  ▾ components
    ▾ tetrisanalyzer
      ▾ piece
        __init__.py
        core.py
        shape.py
</code></pre><h4 id="clojure">Clojure</h4><p>In Clojure, the <a href="https://cljdoc.org/d/polylith/clj-poly/CURRENT/doc/interface">interface</a> is often just a single namespace with the name <code>interface</code>:</p><pre><code class="language-shell">  ▾ components
    ▾ piece
      ▾ src
        ▾ tetrisanalyzer
          ▾ piece
            interface.clj
</code></pre><p>Implemented like this:</p><pre><code class="language-clojure">(ns tetrisanalyzer.piece.interface
  (:require [tetrisanalyzer.piece.shape :as shape]))

(def I 1)
(def Z 2)
(def S 3)
(def J 4)
(def L 5)
(def T 6)
(def O 7)

(defn piece [p rotation]
  (get-in shape/pieces [p rotation]))
</code></pre><h4 id="a-language-comparision">A language comparision</h4><p>Let&apos;s see what differences there are in the two languages:</p><pre><code class="language-clojure">;; Clojure
(defn piece [p rotation]
  (get-in shape/pieces [p rotation]))
</code></pre><pre><code class="language-python"># Python
def piece(p, rotation):
    return shape.pieces[p][rotation]
</code></pre><p>An obvious difference here is that Clojure is a <a href="https://en.wikipedia.org/wiki/Lisp">Lisp</a> dialect, while Python uses a more traditional syntax. This means that if you want anything to happen in Clojure, you put it <em>first</em> in a <em>list</em>:</p><ul><li><pre><code class="language-clojure">(defn piece ...)
</code></pre>is a <a href="https://clojure.org/reference/macros">macro</a> that expands to <code>(def piece (fn ...))</code> which defines the function <code>piece</code></li><li><pre><code class="language-clojure">(get-in shape/pieces [p rotation])
</code></pre>is a call to the function <a href="https://clojuredocs.org/clojure.core/get-in">clojure.core/get-in</a>, where:<ul><li>The first argument <code>shape/pieces</code> refers to the <code>pieces</code> vector in the <a href="https://github.com/tengstrand/tetrisanalyzer/blob/polylith-blog-part-01/langs/clojure/tetris-polylith/components/piece/src/tetrisanalyzer/piece/shape.clj">shape namespace</a></li><li>The second argument creates the <a href="https://clojuredocs.org/clojure.core/vector">vector</a> <code>[p rotation]</code> with two arguments:<ul><li><code>p</code> is a value between 1 and 7, representing one of the pieces: <code>I</code>, <code>Z</code>, <code>S</code>, <code>J</code>, <code>L</code>, <code>T</code>, and <code>O</code></li><li><code>rotation</code> is a value between 0 and 3, representing the number of 90-degree rotations</li></ul></li></ul></li></ul><p>Another significant difference is that data is <a href="https://clojure.org/reference/data_structures">immutable</a> in Clojure, while in Python it&apos;s mutable (like the <code>pieces</code> data structure).</p><p>However, a similarity is that both languages are dynamically typed, but uses concrete types in the compiled code:</p><pre><code class="language-clojure">;; Clojure
(class \Z) ;; Returns java.lang.Character
(class 2)  ;; Returns java.lang.Long
(class Z)  ;; Returns java.lang.Long (since Z is bound to 2)
</code></pre><pre><code class="language-python"># Python
type(&apos;Z&apos;)  # Returns &lt;class &apos;str&apos;&gt; (characters are strings in Python)
type(2)    # Returns &lt;class &apos;int&apos;&gt;
type(Z)    # Returns &lt;class &apos;int&apos;&gt; (since Z is bound to 2)
</code></pre><p>The languages also share another feature: type information can be added optionally. In Clojure, this is done using <a href="https://clojure.org/reference/java_interop#typehints">type hints</a> for Java interop and performance optimization. In Python, <a href="https://docs.python.org/3/library/typing.html">type hints</a> (introduced in Python 3.5) can be added using the <code>typing</code> module, though they are not enforced at runtime and are primarily used for static type checking with tools like <code>mypy</code>.</p><h2 id="the-board-component">The board component</h2><p>Now let&apos;s continue by creating a <code>board</code> component:</p><pre><code class="language-bash">poly create component name:board
</code></pre><p>Which adds the <code>board</code> component to the workspace:</p><pre><code class="language-bash">▾ tetris-polylith
  ▸ bases
  ▾ components
    ▸ board
    ▸ piece
  ▸ development
  ▸ projects
</code></pre><p>And this is how we create a <code>board</code> component in Python:</p><pre><code class="language-shell">uv run poly create component --name board
</code></pre><p>This adds the <code>board</code> component to the workspace:</p><pre><code class="language-shell">  ▾ components
    ▾ tetrisanalyzer
      ▸ board
      ▸ piece
  ▾ test
    ▾ components
      ▾ tetrisanalyzer
        ▸ board
        ▸ piece
</code></pre><p>The Clojure code that places a piece on the board is implemented like this:</p><pre><code class="language-clojure">(ns tetrisanalyzer.board.core)

(defn empty-board [width height]
  (vec (repeat height (vec (repeat width 0)))))

(defn set-cell [board p x y [cx cy]]
  (assoc-in board [(+ y cy) (+ x cx)] p))

(defn set-piece [board p x y piece]
  (reduce (fn [board cell]
            (set-cell board p x y cell))
          board
          piece))
</code></pre><p>In Python (which uses two blank lines between functions by default):</p><pre><code class="language-python">def empty_board(width, height):
    return [[0] * width for _ in range(height)]


def set_cell(board, p, x, y, cell):
    cx, cy = cell
    board[y + cy][x + cx] = p


def set_piece(board, p, x, y, piece):
    for cell in piece:
        set_cell(board, p, x, y, cell)
    return board
</code></pre><p>Let&apos;s go through these functions.</p><h3 id="empty-board">empty-board</h3><pre><code class="language-clojure">(defn empty-board [width height]
  (vec (repeat height (vec (repeat width 0)))))
</code></pre><p>To explain this function, we can break it down into smaller statements:</p><pre><code class="language-clojure">(defn empty-board [width height]  ;; [4 2]
  (let [row-list (repeat width 0) ;; (0 0 0 0)
        row (vec row-list)        ;; [0 0 0 0]
        rows (repeat height row)  ;; ([0 0 0 0] [0 0 0 0])
        board (vec rows)]         ;; [[0 0 0 0] [0 0 0 0]]
    board))
</code></pre><p>We convert the lists to vectors using the <a href="https://clojuredocs.org/clojure.core/vec">vec</a> function, so that we (later) can access it via index. Note that it is the last value in the function (<code>board</code>) that is returned.</p><h3 id="empty-board-2">empty_board</h3><pre><code class="language-python">def empty_board(width, height):
    return [[0] * width for _ in range(height)]
</code></pre><p>This can be rewritten as:</p><pre><code class="language-python">def empty_board(width, height): # width = 4, height = 2
    row = [0] * width           # row = [0, 0, 0, 0]
    rows = range(height)        # rows = lazy sequence with the length of 2
    board = [row for _ in rows] # board = [[0, 0, 0, 0], [0, 0, 0, 0]]
    return board
</code></pre><p>The <code>[row for _ in rows]</code> statement is a <a href="https://www.geeksforgeeks.org/python/python-list-comprehension/">list comprehension</a> and is a way to create data structures in Python by looping.</p><p>We loop twice through <code>range(height)</code>, which yields the values 0 and 1, but we&apos;re not interested in these values, so we use the <code>_</code> placeholder.</p><h3 id="set-cell">set-cell</h3><pre><code class="language-clojure">(defn set-cell [board p x y [cx cy]]
  (assoc-in board [(+ y cy) (+ x cx)] p))
</code></pre><p>Let&apos;s break it down into an alternative implementation and call it with:</p><pre><code class="language-clojure">board = [[0 0 0 0] [0 0 0 0]] 
p = 6, x = 2, y = 0, cell = [0 1])
</code></pre><pre><code class="language-clojure">(defn set-cell [board p x y cell]
  (let [[cx cy] cell             ;; Destructures [0 1] into cx = 0, cy = 1
        xx (+ x cx)              ;; xx = 2 + 0 = 2
        yy (+ y cy)]             ;; yy = 0 + 1 = 1
    (assoc-in board [yy xx] p))) ;; [[0 0 0 0] [0 0 6 0]]
</code></pre><p>In the original version, <a href="https://clojure.org/guides/destructuring">destructuring</a> of <code>[cx cy]</code> happens directly in the function&apos;s parameter list. The <code>assoc-in</code> function works like <code>board[y][x]</code> in Python in this example, with the difference that it doesn&apos;t mutate, but instead returns a new immutable board.</p><h3 id="set-cell-2">set_cell</h3><pre><code class="language-python">def set_cell(board, p, x, y, cell):
    cx, cy = cell
    board[y + cy][x + cx] = p  # [[0,0,0,0] [0,0,6,0]]
</code></pre><p>As mentioned earlier, this code mutates the two-dimensional list in place. It doesn&apos;t return anything, which differs from the Clojure version that returns a new board with one cell changed.</p><h3 id="set-piece">set-piece</h3><pre><code class="language-clojure">(defn set-piece [board p x y piece]
  (reduce (fn [board cell]
            (set-cell board p x y cell))
          board   ;; An empty board as initial value
          piece)) ;; cells: [[1 0] [0 1] [1 1] [2 1]]
</code></pre><p>If you are new to <a href="https://clojuredocs.org/clojure.core/reduce">reduce</a>, think of it as a recursive function that processes each element in a collection, accumulating a result as it goes. The initial call to <code>set-cell</code> will use an empty board and the first <code>[1 0]</code> cell from <code>piece</code>, then use the returned <code>board</code> from <code>set-cell</code> and the second cell <code>[0 1]</code> from <code>piece</code> to call <code>set-cell</code> again, and continue like that until it has applied all cells in <code>piece</code>, where it returns a new board.</p><h3 id="set-piece-2">set_piece</h3><pre><code class="language-python">def set_piece(board, p, x, y, piece):
    for cell in piece:
        set_cell(board, p, x, y, cell)
    return board
</code></pre><p>The Python version is pretty straight forward, with a for loop that mutates the board. We choose to return the board to make the function more flexible, allowing it to be used in expressions and enabling method chaining, which is a common Python pattern, even though the board is already mutated in place.</p><h2 id="test">Test</h2><p>The test looks like this in Clojure:</p><pre><code class="language-clojure">(ns tetrisanalyzer.board.core-test
  (:require [clojure.test :refer :all]
            [tetrisanalyzer.piece.interface :as piece]
            [tetrisanalyzer.board.core :as board]))

(def empty-board [[0 0 0 0 0 0 0 0 0 0]
                  [0 0 0 0 0 0 0 0 0 0]
                  [0 0 0 0 0 0 0 0 0 0]
                  [0 0 0 0 0 0 0 0 0 0]
                  [0 0 0 0 0 0 0 0 0 0]
                  [0 0 0 0 0 0 0 0 0 0]
                  [0 0 0 0 0 0 0 0 0 0]
                  [0 0 0 0 0 0 0 0 0 0]
                  [0 0 0 0 0 0 0 0 0 0]
                  [0 0 0 0 0 0 0 0 0 0]
                  [0 0 0 0 0 0 0 0 0 0]
                  [0 0 0 0 0 0 0 0 0 0]
                  [0 0 0 0 0 0 0 0 0 0]
                  [0 0 0 0 0 0 0 0 0 0]
                  [0 0 0 0 0 0 0 0 0 0]])

(deftest empty-board-test
  (is (= empty-board
         (board/empty-board 10 15))))

(deftest set-piece-test
  (let [T piece/T
        rotate-two-times 2
        piece-t (piece/piece T rotate-two-times)
        x 5
        y 13]
    (is (= [[0 0 0 0 0 0 0 0 0 0]
            [0 0 0 0 0 0 0 0 0 0]
            [0 0 0 0 0 0 0 0 0 0]
            [0 0 0 0 0 0 0 0 0 0]
            [0 0 0 0 0 0 0 0 0 0]
            [0 0 0 0 0 0 0 0 0 0]
            [0 0 0 0 0 0 0 0 0 0]
            [0 0 0 0 0 0 0 0 0 0]
            [0 0 0 0 0 0 0 0 0 0]
            [0 0 0 0 0 0 0 0 0 0]
            [0 0 0 0 0 0 0 0 0 0]
            [0 0 0 0 0 0 0 0 0 0]
            [0 0 0 0 0 0 0 0 0 0]
            [0 0 0 0 0 0 T 0 0 0]
            [0 0 0 0 0 T T T 0 0]]
           (board/set-piece empty-board T x y piece-t)))))
</code></pre><p>Let&apos;s <a href="https://cljdoc.org/d/polylith/clj-poly/0.3.31/doc/testing">execute the tests</a> to check that everything works as expected:</p><pre><code class="language-shell">poly test :dev
</code></pre><img src="assets/05-tetris-playing-ai-the-polylith-way/poly-test.png" alt="Poly test output" style="width: 500px; height: auto; display: block; margin: 20px 0;"><p>The tests passed!</p><h4 id="python-4">Python</h4><p>Now, let&apos;s add a Python test for the <code>board</code>:</p><pre><code class="language-python">from tetrisanalyzer import board, piece

empty_board = [
    [0, 0, 0, 0, 0, 0, 0, 0, 0, 0],
    [0, 0, 0, 0, 0, 0, 0, 0, 0, 0],
    [0, 0, 0, 0, 0, 0, 0, 0, 0, 0],
    [0, 0, 0, 0, 0, 0, 0, 0, 0, 0],
    [0, 0, 0, 0, 0, 0, 0, 0, 0, 0],
    [0, 0, 0, 0, 0, 0, 0, 0, 0, 0],
    [0, 0, 0, 0, 0, 0, 0, 0, 0, 0],
    [0, 0, 0, 0, 0, 0, 0, 0, 0, 0],
    [0, 0, 0, 0, 0, 0, 0, 0, 0, 0],
    [0, 0, 0, 0, 0, 0, 0, 0, 0, 0],
    [0, 0, 0, 0, 0, 0, 0, 0, 0, 0],
    [0, 0, 0, 0, 0, 0, 0, 0, 0, 0],
    [0, 0, 0, 0, 0, 0, 0, 0, 0, 0],
    [0, 0, 0, 0, 0, 0, 0, 0, 0, 0],
    [0, 0, 0, 0, 0, 0, 0, 0, 0, 0],
]


def test_empty_board():
    assert empty_board == board.empty_board(10, 15)


def test_set_piece():
    T = piece.T
    rotate_two_times = 2
    piece_t = piece.piece(T, rotate_two_times)
    x = 5
    y = 13
    expected = [
        [0, 0, 0, 0, 0, 0, 0, 0, 0, 0],
        [0, 0, 0, 0, 0, 0, 0, 0, 0, 0],
        [0, 0, 0, 0, 0, 0, 0, 0, 0, 0],
        [0, 0, 0, 0, 0, 0, 0, 0, 0, 0],
        [0, 0, 0, 0, 0, 0, 0, 0, 0, 0],
        [0, 0, 0, 0, 0, 0, 0, 0, 0, 0],
        [0, 0, 0, 0, 0, 0, 0, 0, 0, 0],
        [0, 0, 0, 0, 0, 0, 0, 0, 0, 0],
        [0, 0, 0, 0, 0, 0, 0, 0, 0, 0],
        [0, 0, 0, 0, 0, 0, 0, 0, 0, 0],
        [0, 0, 0, 0, 0, 0, 0, 0, 0, 0],
        [0, 0, 0, 0, 0, 0, 0, 0, 0, 0],
        [0, 0, 0, 0, 0, 0, 0, 0, 0, 0],
        [0, 0, 0, 0, 0, 0, T, 0, 0, 0],
        [0, 0, 0, 0, 0, T, T, T, 0, 0],
    ]

    assert expected == board.set_piece(empty_board, T, x, y, piece_t)
</code></pre><p>Let&apos;s install and run the tests using <a href="https://docs.pytest.org/en/stable/">pytest</a>:</p><pre><code class="language-shell">uv add pytest --dev
</code></pre><p>And run the tests:</p><pre><code class="language-shell">uv run pytest
</code></pre><img src="assets/05-tetris-playing-ai-the-polylith-way/pytest.png" alt="Pytest output" style="width: 550px; height: auto; display: block; margin: 20px 0;"><p>With that, we have finished the first post in this blog series!</p><p>If you&apos;re eager to see a self-playing Tetris program, I happen to have made a couple in other languages that you can watch <a href="https://github.com/tengstrand/tetrisanalyzer">here</a>.</p><a href="https://github.com/tengstrand/tetrisanalyzer" style="text-decoration: none; display: block; margin-top: -15px;">
<div style="display: flex; gap: 20px; align-items: stretch; margin: -5px 0 -20px 0;">
  <div style="height: 200px; display: flex; align-items: center;">
    <img src="assets/05-tetris-playing-ai-the-polylith-way/tetris-analyzer-scala.png" alt="Tetris Analyzer Scala" style="height: 200px; width: auto; object-fit: contain; display: block;">
  </div>
  <div style="height: 200px; display: flex; align-items: center;">
    <img src="assets/05-tetris-playing-ai-the-polylith-way/tetris-analyzer-cpp.png" alt="Tetris Analyzer C++" style="height: 200px; width: auto; object-fit: contain; display: block;">
  </div>
  <div style="height: 200px; display: flex; align-items: center;">
    <img src="assets/05-tetris-playing-ai-the-polylith-way/tetris-analyzer-tool.png" alt="Tetris Analyzer Tool" style="height: 200px; width: auto; object-fit: contain; display: block;">
  </div>
</div>
</a><p>Happy Coding!</p></div>]]></content>
  </entry>
  <entry>
    <id>https://tengstrand.github.io/blog/2023-11-01-understanding-polylith-through-the-lens-of-hexagonal-architecture.html</id>
    <link href="https://tengstrand.github.io/blog/2023-11-01-understanding-polylith-through-the-lens-of-hexagonal-architecture.html"/>
    <title>Understanding Polylith through the lens of Hexagonal Architecture</title>
    <updated>2023-11-01T23:59:59+00:00</updated>
    <content type="html"><![CDATA[<div><blockquote><p>In the Hexagonal architecture, we start with the application core, and let that grow over time. Polylith starts at another end, with the bricks, where each brick does one thing, and if we want to do one more thing, then we create another brick.</p></blockquote><img src="assets/04-understanding-polylith-through-the-lens-of-hexagonal-architecture/glasses.webp" alt="Understanding Polylith through the lens of Hexagonal Architecture" style="width: 550px; max-width: 100%; display: block; margin: 15px 0;" /><p>If you are a fan of the <a href="https://en.wikipedia.org/wiki/Hexagonal_architecture_(software)">Hexagonal</a> architecture, also known as Ports &amp; Adapters, we think you’ll love the way <a href="https://polylith.gitbook.io/polylith">Polylith</a> turns your system into fine-grained Lego-like bricks!</p><!-- end-of-preview --><p>The Hexagonal architecture was invented in 2005 by <a href="https://en.wikipedia.org/wiki/Alistair_Cockburn">Alistair Cockburn</a>. His <a href="https://alistair.cockburn.us/hexagonal-architecture/">article</a> states that it “Allows an application to equally be driven by users, programs, automated test or batch scripts, and to be developed and tested in isolation from its eventual run-time devices and databases”.</p><p>The solution consists of three types of building blocks; <em>ports</em>, <em>adapters</em>, and the <em>application core</em>:</p><img src="assets/04-understanding-polylith-through-the-lens-of-hexagonal-architecture/hexagonal-architecture.webp" alt="Hexagonal Architecture" style="width: 480px; max-width: 100%; display: block; margin: 30px 0;" /><p>The picture shows a user that interacts with a user interface that talks to a Hexagonal backend application. There is also another system that interacts directly with the same application.</p><p>The main idea in the Hexagonal architecture is to isolate the core from the outside world:</p><ol><li>The primary adapters (1) receive calls from different systems, and serve as a bridge between the application core (3) and the outside world.</li><li>The incoming ports (2) abstract away implementation details in the application core (3) and only expose what each adapter (1) needs to know.</li><li>The application core (3) consists of business domain logic for an application, and only knows about itself and outgoing ports (4).</li><li>The outgoing ports (4) expose functionality that is not part of the business logic (3), and abstract away implementation details in the secondary adapters (5).</li><li>The secondary adapters (5) implement the outgoing ports (4), typically IO operations such as interactions with databases, message queues, the file system, and third-party APIs.</li></ol><p>Let&apos;s extract a slice, so we can more easily reason about these building blocks:</p><img src="assets/04-understanding-polylith-through-the-lens-of-hexagonal-architecture/hexagonal-slice1.webp" alt="Hexagonal Architecture Slice" style="width: 480px; max-width: 100%; display: block; margin: 30px 0;" /><p>This shows how a user, via a user interface (UI), talks to a REST service that communicates with a database.</p><img src="assets/04-understanding-polylith-through-the-lens-of-hexagonal-architecture/hexagonal-slice2.webp" alt="Hexagonal Architecture Slice" style="width: 480px; max-width: 100%; display: block; margin: 30px 0;" /><p>Here, a user uses a command line tool, which accesses a database and a file system from a shell.</p><img src="assets/04-understanding-polylith-through-the-lens-of-hexagonal-architecture/hexagonal-slice2.webp" alt="Hexagonal Architecture Slice" style="width: 480px; max-width: 100%; display: block; margin: 30px 0;" /><p>The architecture leaves some flexibility when it comes to how the ports can be organized. Here we have switched the number of incoming and outgoing ports.</p><p>The Hexagonal architecture makes the application core depend less on its surroundings, which makes it easier to test and e.g. use an in-memory database when testing the app with a script.</p><p>Alistair Cockburn doesn’t talk much about how to handle larger systems in his <a href="https://alistair.cockburn.us/hexagonal-architecture/">article</a>, but there is a “Distributed, Large-Team Development” section that mentions that a system can be split into several applications.</p><p><a href="https://en.wikipedia.org/wiki/Hexagonal_architecture_(software)">Wikipedia</a> says that “According to some authors, the hexagonal architecture is at the origin of the <a href="https://en.wikipedia.org/wiki/Microservices">microservices architecture</a>”.</p><p>Here is how it may look like:</p><img src="assets/04-understanding-polylith-through-the-lens-of-hexagonal-architecture/micro-services.webp" alt="Microservices Architecture" style="width: 480px; max-width: 100%; display: block; margin: 30px 0;" /><p>If too many charts make your eyes hurt, hold on, further down there will be references to code examples.</p><p>Now it’s high time to look at how the Polylith architecture works!</p><h4 id="the-polylith-way">The Polylith way</h4><p>Polylith is a component based architecture that uses small LEGO®-like bricks that can be combined into various services and tools.</p><p>Working with a Polylith system is like having a Lego box with bricks:</p><img src="assets/04-understanding-polylith-through-the-lens-of-hexagonal-architecture/lego-box.webp" alt="Lego Box" style="width: 300px; max-width: 100%; display: block; margin: 30px 0;" /><p>In the Lego box we find two categories of <code>bricks</code>. The <code>components</code> in green, and the <code>bases</code> in blue. More on these categories later.</p><p>The bricks can be combined into any set of services and tools, called <code>projects</code> in Polylith:</p><img src="assets/04-understanding-polylith-through-the-lens-of-hexagonal-architecture/projects.webp" alt="Projects" style="width: 400px; max-width: 100%; display: block; margin: 30px 0;" /><p>We also have a special project called <code>development</code> which contains all bricks, and is used when working with the code:</p><img src="assets/04-understanding-polylith-through-the-lens-of-hexagonal-architecture/development.webp" alt="Development" style="width: 160px; max-width: 100%; display: block; margin: 30px 0;" /><p>All bricks and projects live together in a <a href="https://en.wikipedia.org/wiki/Monorepo">monorepo</a>:</p><img src="assets/04-understanding-polylith-through-the-lens-of-hexagonal-architecture/monorepo.webp" alt="Monorepo" style="width: 360px; max-width: 100%; display: block; margin: 30px 0;" /><p>Here we illustrate how bricks are used across projects:</p><img src="assets/04-understanding-polylith-through-the-lens-of-hexagonal-architecture/usage-across-services.webp" alt="Usage across monorepos" style="width: 360px; max-width: 100%; display: block; margin: 30px 0;" /><p>For example, the <code>db</code> component is used in both <code>backend</code> and <code>email-lambda</code>. This helps us remove code duplication and gives a tremendous level of reuse across the entire codebase.</p><h3 id="development">Development</h3><p>The <code>development</code> project gives us a monolithic development experience so we can easily search, test, refactor, and debug the code, even across services.</p><p>You may wonder what a single development project has to do with an architecture. There are three main reasons:</p><p>Firstly, it guarantees that all bricks fit together, so that they can be combined in any way into projects, and then be built into artifacts. Bricks have access to all other component interfaces, which make them easy to create.</p><p>Secondly, how the code is executed in production is an implementation detail in Polylith. The philosophy is that we should be able to change how to run the code in production without affecting the development experience, and vice versa.</p><p>Thirdly, the single development experience is there to speed up the feedback loop and to make us more productive. Having all the code in one place gives us a simpler development setup compared to having several services running locally. It also improves the testing experience, including potential support for incremental testing.</p><h3 id="project">Project</h3><p>A project is used to assemble a set of bricks into one place, so that we can build different kinds of artifacts from them, e.g. services and tools.</p><p>A command line tool can look something like this in Polylith:</p><img src="assets/04-understanding-polylith-through-the-lens-of-hexagonal-architecture/cli-tool-slice1.webp" alt="CLI Tool" style="width: 480px; max-width: 100%; display: block; margin: 30px 0;" /><p>We define a project in Polylith by listing the included bricks by name in a configuration file, similar to how libraries are handled but without giving a version.</p><p>This makes us stop thinking of code as layers or other shapes. Instead we can concentrate on one brick at a time, without caring about dependencies or how things are executed in production.</p><p>If we follow the call chain from the shell to the file system, it could look something like this:</p><img src="assets/04-understanding-polylith-through-the-lens-of-hexagonal-architecture/cli-tool-slice2.webp" alt="CLI Tool Slice" style="width: 480px; max-width: 100%; display: block; margin: 30px 0;" /><p>The blue brick receives a call from the shell that delegates to a number of bricks, ending with the file brick that touches the <code>file</code> system.</p><h3 id="a-comparison">A comparison</h3><p>To better understand the difference between <a href="https://polylith.gitbook.io/polylith/">Polylith</a> and the <a href="https://alistair.cockburn.us/hexagonal-architecture">Hexagonal architecture</a>, let&apos;s compare the two:</p><img src="assets/04-understanding-polylith-through-the-lens-of-hexagonal-architecture/hexagon-simplified.webp" alt="Hexagon Simplified" style="width: 360px; max-width: 100%; display: block; margin: 30px 0;" /><h3 id="component">Component</h3><p>Components in Polylith are our composable building blocks:</p><img src="assets/04-understanding-polylith-through-the-lens-of-hexagonal-architecture/component.webp" alt="Component" style="width: 200px; max-width: 100%; display: block; margin: 30px 0;" /><p>A component (c) has an interface (i) that delegates incoming calls to its implementation (x). We often skip showing the interface and instead illustrate the component as a green box (c).</p><p>The interface (i) sometimes has the same role as a primary port (2):</p><img src="assets/04-understanding-polylith-through-the-lens-of-hexagonal-architecture/component-primary-port.webp" alt="Component Primary Port" style="width: 270px; max-width: 100%; display: block; margin: 30px 0;" /><p>In that case, the component implementation (x) corresponds to a subset (3) of an application core (6).</p><p>The interface (i) can also have the role of outgoing port (4):</p><img src="assets/04-understanding-polylith-through-the-lens-of-hexagonal-architecture/component-outgoing-port.webp" alt="Component Outgoing Port" style="width: 280px; max-width: 100%; display: block; margin: 30px 0;" /><p>In that case, the implementation (x) corresponds to the secondary adapter (5).</p><p>Components only know about interfaces (i).</p><h3 id="base">Base</h3><p>A base is a bridge between the outside world and the components it delegates to (via interfaces):</p><img src="assets/04-understanding-polylith-through-the-lens-of-hexagonal-architecture/base.webp" alt="Base" style="width: 280px; max-width: 100%; display: block; margin: 30px 0;" /><p>A base (b) has a public API (a) that receives incoming calls from the outside world (w), and delegates (d) them to interfaces (i) and in rare cases other bases (b). We often skip showing the different parts of the base (a + d) and instead illustrate it as a blue box (b):</p><img src="assets/04-understanding-polylith-through-the-lens-of-hexagonal-architecture/base-equals-primary-adapter.webp" alt="Base equals Primary Adapter" style="width: 230px; max-width: 100%; display: block; margin: 30px 0;" /><p>A base (b) has the same role as the primary adapter (1) which is to expose a public API.</p><p>Bases only know about other bases and interfaces (i).</p><h3 id="brick">Brick</h3><p>Brick is the common name for a component or base:</p><img src="assets/04-understanding-polylith-through-the-lens-of-hexagonal-architecture/brick.webp" alt="Brick" style="width: 135px; max-width: 100%; display: block; margin: 30px 0;" /><p>The name comes from the fact that they are small and composable, like LEGO® bricks.</p><p>A way of thinking about bricks is that they are Hexagon application cores in miniature:</p><img src="assets/04-understanding-polylith-through-the-lens-of-hexagonal-architecture/brick-application-core.webp" alt="Brick Application Core" style="width: 210px; max-width: 100%; display: block; margin: 30px 0;" /><p>This component accesses three different interfaces. The component doesn’t know how the interfaces are implemented, in the same way an application core doesn’t know which secondary adapters are behind the outgoing ports.</p><p>One difference is that behind the interfaces to the right, there can be both “secondary adapters” and pure domain logic.</p><p>To better understand the differences, you can see a Polylith project as made up by many &quot;mini application cores&quot;, which could look something like this:</p><img src="assets/04-understanding-polylith-through-the-lens-of-hexagonal-architecture/project-as-application-cores.webp" alt="Project as Application Cores" style="width: 400px; max-width: 100%; display: block; margin: 30px 0;" /><p>The &quot;mini core&quot; to the left is represented by a base in Polylith. The five domain “mini cores” in the middle will be components, and then we have two more “mini cores” to the right that encapsulate different IO-operations, which also will turn into components.</p><p>The eight &quot;mini cores&quot; are assembled into an application in Polylith:</p><img src="assets/04-understanding-polylith-through-the-lens-of-hexagonal-architecture/mini-cores.webp" alt="Mini Cores" style="width: 160px; max-width: 100%; display: block; margin: 30px 0;" /><p>Applications are called <code>projects</code> in Polylith, and are illustrated like this:</p><img src="assets/04-understanding-polylith-through-the-lens-of-hexagonal-architecture/project.webp" alt="Project" style="width: 150px; max-width: 100%; display: block; margin: 30px 0;" /><p>Polylith doesn&apos;t force you to organize your bricks in a certain way, but because it’s so easy to create small, cohesive components, a Polylith system tends to end up with many components, each of which does <a href="https://en.wikipedia.org/wiki/Single-responsibility_principle">one thing</a>.</p><p>That can be a subdomain, an interface to a database, or a third-party API.</p><h3 id="the-application-core">The Application core</h3><p>Let&apos;s see what an application core could look like in Polylith:</p><img src="assets/04-understanding-polylith-through-the-lens-of-hexagonal-architecture/application-core-in-polylith.webp" alt="Application Core in Polylith" style="width: 550px; max-width: 100%; display: block; margin: 30px 0;" /><p>Here is an example of how a primary adapter (1) delegates to an incoming port (2) that delegates to a subdomain (3) that calls three other parts of the application domain (6) and two outgoing ports (4).</p><p>In Polylith, the base (1) does the same job as the primary adapter. The four subdomains and the two secondary ports with associated secondary adapters, are replaced by six components in this example.</p><p>If we strip away the calls, the two applications can be illustrated like this:</p><img src="assets/04-understanding-polylith-through-the-lens-of-hexagonal-architecture/application-core-in-polylith-simplified.webp" alt="Application Core in Polylith Simplified" style="width: 480px; max-width: 100%; display: block; margin: 30px 0;" /><p>In the Hexagonal architecture, we start with the application core, and let that grow over time, and maybe split it up into smaller pieces when it gets too big. Alistair’s <a href="https://alistair.cockburn.us/hexagonal-architecture/">article</a> has examples on how to isolate the application core, but leaves no guidance on how to structure the code inside the core.</p><p>Polylith starts at another end, with the bricks. A brick does one thing, and if we want to do one more thing, then we create another brick. We don’t have one or more “application bricks” that we continuously add code to. Instead we end up with a set of bricks that can be put together into various projects.</p><p>Exactly how the code should be executed in production can be postponed to later, and also be easily changed when needed, by regrouping the bricks.</p><h3 id="composability">Composability</h3><p>In object oriented languages, functionality is oriented around objects, but often with one exception: arithmetic operations.</p><p>Back in time when most object oriented languages didn&apos;t have good support for functional style programming, you could still use arithmetic expressions like <code>1 + 2 * 3</code>:</p><img src="assets/04-understanding-polylith-through-the-lens-of-hexagonal-architecture/arithmetic-expression.webp" alt="Arithmetic Expression" style="width: 250px; max-width: 100%; display: block; margin: 30px 0;" /><p>Compare this with an all-in object oriented approach. Note that this is just an example to illustrate the differences, not the optimal way of solving the problem:</p><pre><code>Number one = new Number(1);
Number two = new Number(2);
Number three = new Number(3);
Number result = one.plus(two.times(three));
</code></pre><p>As you can see, this requires more code and doesn&apos;t read as well.</p><p>Let’s list the different ways an object A can gain access to an objects B:</p><ul><li>Pass in B as an argument when calling a method of A.</li><li>Pass in B in the constructor of A and save it as a member of A.</li><li>Pass in B to a setter method of A and save it as a member of A.</li><li>Use reflection to set a member B in A.</li></ul><p>Any of these variants will give A access to B:</p><img src="assets/04-understanding-polylith-through-the-lens-of-hexagonal-architecture/dependency-injection.webp" alt="Dependency Injection" style="width: 230px; max-width: 100%; display: block; margin: 30px 0;" /><p>These kinds of operations can sometimes be performed by a <a href="https://en.wikipedia.org/wiki/Dependency_injection">dependency injection</a> framework, but under the hood, some of the operations above will be used.</p><p>The Hexagonal architecture originates from the object oriented world, and the code examples in Alistair’s <a href="https://alistair.cockburn.us/hexagonal-architecture/">article</a> uses dependency injection.</p><p>In the <code>1 + 2 * 3</code> example, we didn’t have to specify the relationships between the operators and the operands, which made the functional solution simpler and more readable.</p><p>Polylith originates from the functional world and takes this approach to software design. Bricks are composable, the same way <code>1 + 2 * 3</code> is, and we don’t need to specify how each brick depends on other bricks when we assemble them into projects at build time. It’s enough to specify which bricks to include:</p><img src="assets/04-understanding-polylith-through-the-lens-of-hexagonal-architecture/project.webp" alt="Project" style="width: 130px; max-width: 100%; display: block; margin: 30px 0;" /><p>Almost too simple!</p><p>In Polylith we don’t configure how the bricks depend on each other. As long as they compile in the development project, we are fine. All bricks have access to all components, or to be precise, all interfaces, and they are connected by using direct function calls.</p><p>So when a brick needs some functionality that is exposed in any of the interfaces, we don’t have to add an annotation, edit a configuration file or add a member to a class to gain access. All we have to do is to import the brick’s interface namespace in the code that needs it, in the exact same way we do with libraries. It doesn’t need to be more complicated than that!</p><p>Note that in some situations we need polymorphism at runtime, and when that happens, we need to solve that in a traditional way.</p><p>It would be possible to implement a variant of Polylith using dependency injection, but it would also be more complex and more like the object oriented example, and less like <code>1 + 2 * 3</code>:</p><img src="assets/04-understanding-polylith-through-the-lens-of-hexagonal-architecture/functional-vs-oo.webp" alt="Functional vs OO" style="width: 480px; max-width: 100%; display: block; margin: 30px 0;" /><p>The bottom line is that putting things side by side is more composable and less complex than putting things inside each other.</p><h3 id="reducing-complexity">Reducing complexity</h3><p>As you have probably already figured out, Polylith is very much a tool to fight complexity.</p><img src="assets/04-understanding-polylith-through-the-lens-of-hexagonal-architecture/connections.webp" alt="Connections" style="width: 400px; max-width: 100%; display: block; margin: 30px 0;" /><p>I explain how composability, size, and other things affect complexity <a href="03-the-origin-of-complexity.html">here</a>.</p><h3 id="code-examples">Code examples</h3><p>If you want to compare different backend systems, there is a cool project called <a href="https://github.com/gothinkster/realworld">RealWorld</a> where different languages implement the same backend API spec.</p><img src="assets/04-understanding-polylith-through-the-lens-of-hexagonal-architecture/realworld.webp" alt="Real World" style="width: 480px; max-width: 100%; display: block; margin: 30px 0;" /><p>There is an implementation using the Hexagonal architecture in Go <a href="https://github.com/labasubagia/realworld-backend">here</a>, and a Polylith example in Clojure <a href="https://github.com/furkan3ayraktar/clojure-polylith-realworld-example-app">here</a>.</p><p>You can explore the Polylith example without installing anything.</p><img src="assets/04-understanding-polylith-through-the-lens-of-hexagonal-architecture/gitpod-polylith-realworld.webp" alt="Gitpod Polylith RealWorld" style="width: 480px; max-width: 100%; display: block; margin: 30px 0;" /><p>There are instructions <a href="https://github.com/PEZ/clojure-polylith-realworld-example-app/blob/master/gitpod.md">here</a> for getting a full development environment to a live Polylith Real World example running in your browser, with only a few clicks. It guides you in how to use Clojure so that you can experiment with Polylith!</p><h2 id="code-sharing">Code sharing</h2><p>The main goals of Polylith are to decrease complexity and make coding a more joyful experience. <a href="https://en.wikipedia.org/wiki/Duplicate_code">Code duplication</a> is generally considered undesirable, which is also why code sharing is built-in to Polylith.</p><p>We could create libraries as a way of sharing code within our system and across services. But that would also increase the complexity and harm the development experience, which we want to avoid.</p><p>Polylith solves the sharing problem at build time. These are the prerequisites for it to work:</p><ol><li>Use a <a href="https://en.wikipedia.org/wiki/Monorepo">monorepo</a>.</li><li>Use shareable Lego-like bricks at the source code level.</li><li>Enable subsets of bricks to be built into artifacts.</li></ol><p>Let’s go through them.</p><h3 id="use-a-monorepo">Use a monorepo</h3><p>In Polylith, we don&apos;t use libraries to share code between services and tools, because of the <a href="https://polylith.gitbook.io/polylith/introduction/sharing-code">problems that come with it</a>:</p><img src="assets/04-understanding-polylith-through-the-lens-of-hexagonal-architecture/monorepo-code-sharing.webp" alt="Monorepo Code Sharing" style="width: 380px; max-width: 100%; display: block; margin: 30px 0;" /><p>Once we abandon this idea, we need to use a monorepo.</p><h3 id="use-shareable-lego-like-bricks-at-the-source-code-level">Use shareable Lego-like bricks at the source code level</h3><p>You can think of Polylith bricks as blocks of code that can be shared across the entire system at build time and are connected with direct function calls in the same way we use libraries.</p><h3 id="enable-subsets-of-bricks-to-be-built-into-artifacts">Enable subsets of bricks to be built into artifacts</h3><p>Once the bricks are represented as plain source code, the next step is to be able to assemble subsets of them into projects and build artifacts from them.</p><p>This can be implemented in different ways, depending on which language and tools you use. The best way we have found is to let the code structure mirror the architecture’s building blocks (bricks and projects) and use IDEs and build tools that have support for multiple source directories.</p><p>Other variants include the use of <a href="https://en.wikipedia.org/wiki/Symbolic_link">symbolic links</a> or a single development project with just one source directory. None of these give the same level of decoupling and composability, so we stick with the multiple source directories variant here.</p><h3 id="examples">Examples</h3><p><a href="https://clojure.org/">Clojure</a>, together with <a href="https://github.com/clojure/tools.deps">tools.deps</a>, has built-in support for multiple source directories.</p><p>Here is an example taken from the <a href="https://github.com/furkan3ayraktar/clojure-polylith-realworld-example-app">clojure-polylith-realworld-example-app</a> project, which lists the bricks in a <a href="https://github.com/furkan3ayraktar/clojure-polylith-realworld-example-app/blob/master/projects/realworld-backend/deps.edn">deps.edn</a> config file:</p><img src="assets/04-understanding-polylith-through-the-lens-of-hexagonal-architecture/deps-config.webp" alt="Deps Config" style="width: 480px; max-width: 100%; display: block; margin: 30px 0;" /><p>In Python we have <a href="https://davidvujic.github.io/python-polylith-docs">Python tools for the Polylith Architecture</a> which uses Poetry together with the Multiproject plugin.</p><p>Here is an example that is taken from its documentation:</p><img src="assets/04-understanding-polylith-through-the-lens-of-hexagonal-architecture/python-config.webp" alt="Python Config" style="width: 600px; max-width: 100%; display: block; margin: 30px 0;" /><p>Another example is Java together with Maven. Java doesn’t support the use of multiple source directories out of the box, but it can be achieved with the <a href="https://www.mojohaus.org/build-helper-maven-plugin/usage.html">build-helper-maven-plugin</a>. Most Java IDEs support Maven based projects, which means we get the IDE integration for free.</p><p>As we mentioned earlier in the previous section, it would be possible to use dependency injection together with a monorepo to share code across applications, but that would also add more complexity and be less composable, which is why we avoid it.</p><h3 id="code-structure">Code structure</h3><p>The standardized code structure in Polylith helps us reason about the code, but it’s also part of the solution to the code sharing puzzle and how to support polymorphism at build time.</p><p>A Polylith codebase lives in a monorepo and is divided into one or more <a href="https://polylith.gitbook.io/polylith/architecture/2.1.-workspace">workspaces</a>. A workspace mirrors the core concepts of the Polylith architecture, like <code>bases</code>, <code>components</code>, and <code>projects</code>.</p><p>In this example, the workspace directory is also the root of the repository. It can have any name, but here we stick with <code>workspace</code>:</p><pre><code>▾ workspace
  ▸ bases
  ▸ components
  ▸ development
  ▸ projects
</code></pre><p>Each brick and project lives in its own directory, e.g.:</p><pre><code><span style="color: #999;">
▾ workspace
  ▾ bases</span>
    ▸ email-lambda
    ▸ reporting-rest-api<span style="color: #999;">
  ▾ components</span>
    ▸ authentication
    ▸ aws-lambda
    ▸ database
    ▸ logger
    ▸ payment
    ▸ signer<span style="color: #999;">
  ▸ development
  ▾ projects</span>
    ▸ email
    ▸ report-generator
</code></pre><p>Each brick stores its own source directories, and each project lists the included bricks in a config file:</p><pre><code><span style="color: #999;">
▾ workspace
  ▾ bases
    ▾ email-lambda</span>
      ▸ src
      ▸ test<span style="color: #999;">
  ▾ components
    ▸ authentication</span>
      ▸ src
      ▸ test<span style="color: #999;">
  ▸ development
  ▾ projects
    ▾ email</span>
      ▸ config.txt
</code></pre><h3 id="base-2">base</h3><p>The namespaces for a base follow this structure:</p><p><code>top-namespace.<span style="color: #8B0000;">base-name</span>.namespaces</code></p><p>First we have the top namespace, which could be any valid namespace, e.g. <code>my.company</code>. Next we have the name of the base, e.g. <code style="color: #8B0000;">email-lambda</code>, followed by one or several namespaces which implement the public API and delegate to component interfaces.</p><h3 id="component-2">component</h3><p>A component is structured in a similar way, but has the interface name directly after the top namespace:</p><p><code>top-namespace.<span style="color: #8B0000;">interface-name</span>.mespaces</code></p><p style="margin-bottom: 0;">A component also has an interface namespace, that delegates incoming calls to implementing namespaces, e.g.:</p><code style="line-height: 1.3; display: block; margin-top: 0;">
com.mycompany.<span style="color: #8B0000;">authentication</span>.interface
com.mycompany.<span style="color: #8B0000;">authentication</span>.core
com.mycompany.<span style="color: #8B0000;">authentication</span>.morestuff
</code><p style="margin-top: 16px; margin-bottom: 0;">An option is to split the interface to sub namespaces, e.g.:</p><code style="line-height: 1.3; display: block; margin-top: 0;">
com.mycompany.<span style="color: #8B0000;">authentication</span>.interface
com.mycompany.<span style="color: #8B0000;">authentication</span>.sub-ifc
</code><p style="margin-top: 16px;">Think of an interface in Polylith as a set of functions (and maybe constants and macros) that exposes a component’s functionality.</p><p>If more than one component implements the <code style="color: #8B0000;">authentication</code> interface, they will live in separate directories under <code>components</code> but use the same <code>com.mycompany.<span style="color: #8B0000;">authentication</span></code> namespace.</p><p>All bricks use the same top namespace, or <code>com.mycompany</code> as in this example.</p><h3 id="project-2">project</h3><p>Each project includes a configuration file that specifies the bricks to include in the project. This is often a single base and a set of components. How this looks depends on which library or build tool you use for your language of choice.</p><p>We can take the previously mentioned <code>realworld-backend</code> service as example:</p><img src="assets/04-understanding-polylith-through-the-lens-of-hexagonal-architecture/deps-config.webp" alt="Deps Config" style="width: 480px; max-width: 100%; display: block; margin: 30px 0;" /><p>The tooling gathers all the brick namespaces into one single “monolith”:</p><code style="line-height: 1.3; display: block; margin-top: 0;">
clojure.realworld.<span style="color: #8B0000;">article</span>.interface
clojure.realworld.<span style="color: #8B0000;">article</span>.interface.spec
clojure.realworld.<span style="color: #8B0000;">article</span>.core
clojure.realworld.<span style="color: #8B0000;">article</span>.spec
clojure.realworld.<span style="color: #8B0000;">article</span>.store
clojure.realworld.<span style="color: #8B0000;">comment</span>.interface
clojure.realworld.<span style="color: #8B0000;">comment</span>.interface.spec
clojure.realworld.<span style="color: #8B0000;">comment</span>.core
clojure.realworld.<span style="color: #8B0000;">comment</span>.spec
clojure.realworld.<span style="color: #8B0000;">comment</span>.store
clojure.realworld.<span style="color: #8B0000;">database</span>.interface
clojure.realworld.<span style="color: #8B0000;">database</span>.score
clojure.realworld.<span style="color: #8B0000;">database</span>.schema
clojure.realworld.<span style="color: #8B0000;">env</span>.interface
clojure.realworld.<span style="color: #8B0000;">env</span>.core
clojure.realworld.<span style="color: #8B0000;">log</span>.interface
clojure.realworld.<span style="color: #8B0000;">log</span>.core
clojure.realworld.<span style="color: #8B0000;">log</span>.config
clojure.realworld.<span style="color: #8B0000;">profile</span>.interface
clojure.realworld.<span style="color: #8B0000;">profile</span>.interface.spec
clojure.realworld.<span style="color: #8B0000;">profile</span>.core
clojure.realworld.<span style="color: #8B0000;">profile</span>.spec
clojure.realworld.<span style="color: #8B0000;">profile</span>.store
clojure.realworld.<span style="color: #8B0000;">spec</span>.interface
clojure.realworld.<span style="color: #8B0000;">spec</span>.core
clojure.realworld.<span style="color: #8B0000;">tag</span>.interface
clojure.realworld.<span style="color: #8B0000;">tag</span>.core
clojure.realworld.<span style="color: #8B0000;">user</span>.interface
clojure.realworld.<span style="color: #8B0000;">user</span>.interface.spec
clojure.realworld.<span style="color: #8B0000;">user</span>.core
clojure.realworld.<span style="color: #8B0000;">user</span>.spec
clojure.realworld.<span style="color: #8B0000;">user</span>.store
</code><p style="margin-top: 16px;">From here we can run tests and build and deploy an artifact, e.g. a service.</p><h3 id="development-2">development</h3><p>As you already know, the <code>development</code> project is used to give us a monolithic user experience.</p><p>However, an important difference from other projects is that you never build and deploy the development project.</p><p>It’s also a place where you put code that is only used during development, for example code that fixes problems in the production database.</p><p>We can even let each developer have their own namespace, e.g. <code>dev.alanturing</code> or <code>dev.adalovelace</code>, where they can put code that they find useful during development.</p><h3 id="tooling-support">Tooling support</h3><p>A Polylith tool can give us additional value, for example help us enforce various constraints, like that bricks only access interfaces, or that all components fulfill the interface contracts. A tool can also help us run tests incrementally, or visualize different aspects of the architecture.</p><p>The <a href="https://cljdoc.org/d/polylith/clj-poly/CURRENT/doc/readme">poly tool</a>, written for Clojure and tools.deps is a good example. This is what the output of the <code>info</code> command looks like for the <a href="https://github.com/furkan3ayraktar/clojure-polylith-realworld-example-app">clojure-polylith-realworld-example-app example app</a>:</p><img src="assets/04-understanding-polylith-through-the-lens-of-hexagonal-architecture/realworld-info.webp" alt="Realworld Info" style="width: 330px; max-width: 100%; display: block; margin: 30px 0;" /><p>By looking at the names and the colors, we can see that this system has a <code>realworld-backend</code> REST service, exposed by the <code>rest-api</code> base, containing nine components with different responsibilities. This gives us a pretty good idea of what problems this system solves and how it&apos;s executed in production.</p><p>It also shows additional information, like the <code>e6f7f20</code> commit hash number and the <code>stable-master</code> <a href="https://git-scm.com/book/en/v2/Git-Basics-Tagging">git tag</a>, which was created when all tests passed in the continuous integration pipeline. This is a marker for the latest stable point in time, which is used by the tool to run tests incrementally.</p><p>The <code>s</code> and <code>t</code> flags tell us whether the <code>src</code> and/or <code>test</code> directories for a brick are included in a project.</p><p>Another example is the <code>deps</code> command:</p><img src="assets/04-understanding-polylith-through-the-lens-of-hexagonal-architecture/realworld-deps.webp" alt="Realworld Deps" style="width: 330px; max-width: 100%; display: block; margin: 30px 0;" /><p>It shows which interfaces (in yellow) each brick depends on. For example, the <code>rest-api</code> base depends on all interfaces, while the <code>tag</code> component only depends on the <code>database</code> interface.</p><p>Finally, here is the output from the <code>libs</code> command:</p><img src="assets/04-understanding-polylith-through-the-lens-of-hexagonal-architecture/realworld-libs.webp" alt="Realworld Libs" style="width: 600px; max-width: 100%; display: block; margin: 30px 0;" /><p>This shows which libraries that are in use, which bricks are using them, and which projects they will be included in.</p><p>The tool also supports incremental testing, which I try to describe <a href="https://polylith.gitbook.io/polylith/introduction/testing-incrementally">here</a>. Having tooling support like this gives the productivity an extra boost by speeding up the feedback loop.</p><p>At the time of writing, there is only tooling support for <a href="https://github.com/clojure/tools.deps">Clojure/tools.deps</a> and <a href="https://davidvujic.github.io/python-polylith-docs/">Python</a>, but we hope more languages will be added in the future. In the meantime, don’t be afraid of using Polylith, even if your language lacks tooling support, you will still get most of the benefits!</p><p>If you are curious about how real <a href="https://cljdoc.org/d/polylith/clj-poly/CURRENT/doc/production-systems">production systems</a> could look, please visit the production systems page of the poly tool documentation.</p><h3 id="summary">Summary</h3><p>A good thing with the Hexagonal architecture is that it separates concerns. However, Polylith takes separation of concerns to the next level.</p><p>Polylith is the first component-based architecture with truly small composable bricks that can be shared across the entire system.</p><p>The bricks help you focus on code quality, changeability, observability, testability, and efficiency, both when developing the code and when deciding on how to run the code in production.</p><p>If you haven’t tried Polylith yet, please do, because it’s a real joy to work with!</p><p>Happy coding!</p></div>]]></content>
  </entry>
  <entry>
    <id>https://tengstrand.github.io/blog/2019-09-14-the-origin-of-complexity.html</id>
    <link href="https://tengstrand.github.io/blog/2019-09-14-the-origin-of-complexity.html"/>
    <title>The origin of complexity</title>
    <updated>2019-09-14T23:59:59+00:00</updated>
    <content type="html"><![CDATA[<div><img src="assets/03-the-origin-of-complexity/guardian-knot.jpg" alt="A golden Gordian knot symbolizing the intertwined nature of complexity" style="width: 30%; max-width: 420px; height: auto;"><p>Writing software is hard.</p><p>There are so many things to deal with, so many moving parts and things that can go wrong that it is easy to get lost. It&apos;s not only about building the <em>right thing</em>, but also about building the <em>thing right</em>.</p><!-- end-of-preview --><p>As a reaction to that, the list of tips on how to best develop software has constantly grown over the years. Sometimes the tips have been quite helpful but others have been contradictory.</p><p>We have learned to not repeat ourselves, avoid mutable state, use pure functions, use interfaces, use polymorphism, prefer composition, use declarative style, avoid temporal coupling, work in small teams, make small commits, avoid long lived branches, test our code, and so on.</p><p>But wouldn&apos;t it be great if we could find one single, simple principle, that is easy to understand and that helps us to reason about software?</p><p>Let&apos;s rewrite the list and add <em>why</em> to get a hint:</p><ul><li><em>Don&apos;t repeat yourself</em> — because that adds coordination</li><li><em>Make it small</em> — because that reduces coordination</li><li><em>Avoid mutable state</em> — because it adds coordination</li><li><em>Use pure functions</em> — because they reduce coordination</li><li><em>Use interfaces</em> — because they reduce coordination</li><li><em>Use polymorphism</em> — because it reduces coordination</li><li><em>Prefer composition</em> — because it reduces coordination</li><li><em>Use declarative style</em> — because it reduces coordination</li><li><em>Avoid temporal coupling</em> — because it introduces coordination</li><li><em>Work in small teams</em> — because it reduces coordination</li><li><em>Make small commits</em> — because it reduces coordination</li><li><em>Avoid long lived branches</em> — because they increase coordination</li><li><em>Test your code</em> — to catch coordination that wasn&apos;t done correctly!</li></ul><p>As you can see, it&apos;s all about <em>coordination</em>!</p><p>Now you may think, what&apos;s wrong with coordination?</p><p>The problem with coordination is that it <em>adds complexity</em> to our systems which make them harder to change and work with. Let&apos;s look at an example.</p><p>Here we have inserted a heading in a simple text editor:</p><pre style="font-family: 'Courier New', Courier, monospace; font-size: 1.1em;">My heading
==========</pre><p>The problem with this is that if we change the heading,</p><pre style="font-family: 'Courier New', Courier, monospace; font-size: 1.1em;">Your heading
==========</pre><p>we also need to update the row below, by adding more = characters. The consequence is that we have introduced <em>coordination</em> that needs to be <em>addressed by a human being</em>. This may be a small problem here, because the missing equal signs are easy to spot and fix, but that&apos;s not always the case.</p><p>Another way to put it is that we have <em>failed to automate</em> the task, by <em>introducing manual work</em> instead of letting the computer do the job for us.</p><p>The solution is to switch to a more advanced text editor, like this:</p><pre style="font-family: 'Courier New', Courier, monospace; font-size: 1.1em;"><u>My heading</u></pre><p>If we now change the text to:</p><pre style="font-family: 'Courier New', Courier, monospace; font-size: 1.1em;"><u>Your heading</u></pre><p>the underline will automatically be updated by the editor, which solves our coordination problem through <em>automation</em> by the computer.</p><p>This correlation could be expressed with something like &quot;when the heading is changed, make sure the corresponding row below has the same number of characters&quot;. This is something that a person could be responsible for, but it could also be delegated to, and <em>automated by</em>, a computer.</p><p>Note that we can&apos;t get rid of all manual work. Automation needs code, written by humans! Of course it&apos;s only a matter of time until even that task has also been taken over by computers, but that&apos;s another story!</p><h2 id="changeability">Changeability</h2><p>When we work with software, we have to deal with the fact that most things around us constantly change.</p><p>That include hardware, protocols, data formats, security standards, operating systems, programming languages, libraries, frameworks, code, tooling, services, methodologies, staff, organisations, and not least ourselves!</p><p>I would argue that <em>changeability</em> is the most important feature of software to fight complexity. If we could find a simple model that is based on simple principles, then we have something useful that will help us create simpler systems.</p><p>This is what we need to do to achieve <em>changeability</em>:</p><ul><li>Increase usability</li><li>Reduce coordination</li></ul><h3 id="usability">Usability</h3><p>Making things <em>usable</em> can be achieved by adapting our systems and tools to people and their limitations and needs. Code is no exception!</p><p>The level of usability of a codebase or part of a codebase has a direct correlation with how easy it is to change.</p><p>Here is what Wikipedia says about <a href="https://en.wikipedia.org/wiki/Usability">usability</a>:</p><blockquote><p><strong>Usability</strong> is the ease of use and learnability of a human-made object such as a tool or device. In <a href="https://en.wikipedia.org/wiki/Software_engineering">software engineering</a>, <strong>usability</strong> is the degree to which a software can be used by specified consumers to achieve quantified objectives with effectiveness, efficiency, and satisfaction in a quantified context of use.</p></blockquote><p>The main ways of achieving usability in software are:</p><ol><li>Make things easy to find, reuse and reason about.</li><li>Use tools and techniques that let you work fast and give you a fast feedback loop.</li><li>Organise people so that you facilitate communication, learning and craftsmanship.</li></ol><p>Usability can be increased in many ways. Here are three examples:</p><p><strong>Example 1:</strong> Give things a good name.</p><p><strong>Example 2:</strong> Use a <a href="https://en.wikipedia.org/wiki/Read%E2%80%93eval%E2%80%93print_loop">REPL</a> to increase the productivity by shortening the feedback loop.</p><p><strong>Example 3:</strong> Agree on a <a href="https://martinfowler.com/bliki/UbiquitousLanguage.html">ubiquitous language</a> when communicating.</p><p>There is a lot to say about usability but it&apos;s a huge research area of its own which we will not delve into here.</p><h3 id="coordination">Coordination</h3><p>We have already said that coordination increases complexity and given some examples of it but we haven&apos;t looked into what causes it or where it arises.</p><h4 id="cause-of-coordination">Cause of coordination</h4><p>There are three main areas that introduce the need for coordination:</p><ul><li><em>Size</em> — when things get bigger</li><li><em>Order</em> — when order matters</li><li><em>Consistency</em> — when consistency matters</li></ul><h4 id="cause-of-coordination-—-size">Cause of coordination — Size</h4><p>When something gets bigger it doesn&apos;t just have a negative effect on the <em>usability</em>; by making things harder to understand and reason about, it also increases the need for <em>coordination</em>.</p><p>There are essentially two ways to minimise size:</p><ul><li><em>Split it up</em> — to reduce coordination</li><li><em>Make it composable</em> — to make it smaller and easier to use</li></ul><p><strong>Split it up</strong></p><p>For example, if we <em>double</em> the number of people in a team by going from three to six people:</p><img src="assets/03-the-origin-of-complexity/connections.webp" alt="Visualization of team communication connections" style="width: 80%; max-width: 336px; height: auto;"><p>The number of ways to communicate increases from three to fifteen, which is a factor of 5! This <em>exponential growth</em> of <em>coordination</em> and <em>complexity</em> is one of the hardest problems to tackle in software. This unfortunate behaviour is the reason why some <a href="https://en.wikipedia.org/wiki/List_of_failed_and_overbudget_custom_software_projects">large projects fail</a>.</p><p>The way to fight complexity is to split things up:</p><img src="assets/03-the-origin-of-complexity/split-it-up.webp" alt="Visualization of splitting teams to reduce coordination" style="width: 80%; max-width: 336px; height: auto;"><p>Here we have two teams of three people, where one person in each team is responsible for communicating with the other team and its own. This has reduced the number of connections from 15 to 7, which is more than a 50% reduction in coordination!</p><p>The same principles apply to code and data which is why it&apos;s better to have small functions than big ones and why a <a href="https://polylith.gitbook.io/polylith">Polylith</a> system made up of small reusable components is preferable to a big <a href="https://en.wikipedia.org/wiki/Monolithic_application">Monolith</a>.</p><p><strong>Make it composable</strong></p><p>The other main technique to reduce size is by making things <em>composable</em>.</p><p>To achieve <em>composability</em> we have to introduce <em>conformity</em> in the way we process things:</p><img src="assets/03-the-origin-of-complexity/composability.webp" alt="Visualization of composability and conformity" style="width: 100%; max-width: 469px; height: auto;"><p>The <a href="https://en.wikipedia.org/wiki/Functional_programming">functional</a> way is to have <em>data</em> as material and <em>functions</em> as tools. The <a href="https://en.wikipedia.org/wiki/Object-oriented_programming">object oriented</a> way is to have <em>data</em> or <em>interfaces</em> as material and <em>objects</em> as tools.</p><p>To make this useful we need to reduce the number of variants of <em>material</em> and make sure the <em>tools</em> can operate on it. As long as that is met, we can allow ourself to have a large set of tools as a way to reduce complexity.</p><p>In Unix, the material consists of <em>lines of strings</em> and the tools are represented by a set of <em>commands</em> which can be combined together like LEGO©:</p><pre><code class="language-bash">tr -cs A-Za-z &apos;\n&apos; | 
tr A-Z a-z | 
sort | 
uniq -c | 
sort -rn | 
sed ${1}q
</code></pre><p style="margin-top: 0.5em; margin-bottom: 0; line-height: 0.5em;">&nbsp;</p><p>This example was taken from a solution that <a href="https://en.wikipedia.org/wiki/Douglas_McIlroy">Douglas McIlroy</a> wrote when he gave feedback to <a href="https://en.wikipedia.org/wiki/Donald_Knuth">Donald Knuth</a>. You can read more about the background <a href="https://franklinchen.com/blog/2011/12/08/revisiting-knuth-and-mcilroys-word-count-programs/">here</a> and also find a <a href="https://rosettacode.org/wiki/Word_frequency#Clojure">list with solutions</a> to the problem written in different languages.</p><h4 id="cause-of-coordination-—-order">Cause of coordination — Order</h4><p>One source of complexity is when we need to coordinate the <em>order</em> in which things happen.</p><p>Sometimes it&apos;s important that things come in a certain order. Code is no exception:</p><img src="assets/03-the-origin-of-complexity/order.webp" alt="Visualization of order and coordination" style="width: 80%; max-width: 336px; height: auto;"><p>Here <em>statement 2</em> must wait for <em>statement 1</em> to finish, which has introduced need for coordination between the two statements. The result is that we can&apos;t swap the order or parallelise the statements.</p><p>Sometimes one thing has to happen before another. In those cases, it&apos;s helpful if that is explicitly expressed, by the code, the planning tool, or whatever tool we use. But if the need for coordination is not clearly expressed, which is often the case with code, then you run an increased risk of introducing errors.</p><p>The solution is to separate <em>what</em> from <em>how</em>. If we can express <em>what</em> needs to be done and delegate <em>how</em> to some other parts, like a function, a queue, a rule engine or a <a href="https://en.wikipedia.org/wiki/Domain-specific_language">DSL</a> engine, then we are in a much better position to care less about the execution order.</p><p>Let&apos;s give some examples where the <em>order</em> is important:</p><p><strong>Example 1:</strong> We plan our work before we start working.</p><p><strong>Example 2:</strong> An <em>init</em> function must be called, before proceeding with other work (temporal coupling).</p><p><strong>Example 3:</strong> A server must be installed with an operating system, a virtual machine, some tools and such, before other software can run on it.</p><p><strong>Example 4:</strong> We learn and practice to achieve craftsmanship before we can perform tasks.</p><p>Some of these tasks, like setting up a server, can be automated which is the way we <em>reduce coordination</em>. Other tasks can&apos;t be fully automated, at least not yet, like planning, learning and practising.</p><h4 id="cause-of-coordination-—-consistency">Cause of coordination — Consistency</h4><p>The last thing on our list that causes coordination is when things need to be consistent. We live in a changing world, and things can very easily &quot;get out of sync&quot;. Another challenge is to avoid duplication.</p><p>There are essentially two ways to keep things in sync:</p><ul><li><em>Have only one of things</em></li><li><em>Move in small steps</em></li></ul><p><strong>Have only one</strong></p><p>An efficient way to ensure that things are consistent is to only have <em>one of everything</em>. The instructions and functions that are part of a programming language are good examples.</p><p>Each &quot;building block&quot;, like an <em>if</em> statement, is only defined <em>once</em>, but can be used from more than one place in the code:</p><img src="assets/03-the-origin-of-complexity/have-only-one.webp" alt="Visualization of having only one definition used in multiple places" style="width: 96%; max-width: 403px; height: auto;"><p>The language itself is also only defined once, but can be used from several places (on different machines). The way we get rid of coordination is to only need to make changes in <em>one place</em>.</p><p>If we have some code or data that is copied and used in more than one place (e.g. two different services) then we have introduced <em>duplication</em> that needs to be <em>coordinated</em> to stay in sync and remain <em>consistent</em>:</p><img src="assets/03-the-origin-of-complexity/coordination.webp" alt="Visualization of duplication requiring coordination" style="width: 70%; max-width: 320px; height: auto;"><p>If we later need to change one of them, e.g. to fix a bug, then we also need to remember to update the other service. The idea that <em>copy&amp;paste</em> can be used to &quot;decouple&quot; services is often an illusion, because it doesn&apos;t remove the <em>need for coordination</em>.</p><p>Sometimes though, you really want to start from scratch. An example is when the <a href="https://www.mysql.com/">MySql</a> database was forked to become <a href="https://mariadb.org/">MariaDB</a>.</p><p>Another example of removing coordination by centralising a definition into one place, is the use of <em>polymorphism</em>:</p><img src="assets/03-the-origin-of-complexity/dispatch.webp" alt="Visualization of polymorphism and dispatch mechanism" style="width: 72%; max-width: 302px; height: auto;"><p>In object orientation, the choice of method to call when invoking a method on an object is based on the type of its class. Functional languages sometimes support an even <a href="https://clojure.org/reference/multimethods">more flexible</a> way of dispatching calls, but the principle is the same.</p><p>The idea is to centralise the dispatching mechanism into <em>one place</em> so that we don&apos;t end up with duplicated <em>if</em> or <em>case</em> statements scattered around the codebase, that then need coordination.</p><p><strong>Move in small steps</strong></p><p>The most common example of when things get <em>out of sync</em> is when people, tools, code, models, hardware, and so on, don&apos;t move with their surroundings.</p><p>The way to tackle the problem is to <em>move in small steps</em>.</p><p>The reason we want to move in small steps, like making small commits in our <a href="https://en.wikipedia.org/wiki/Version_control">VCS</a> system or by having short <a href="https://www.scrum.org/resources/what-is-a-sprint-in-scrum">sprints</a>, is that the amount of coordination we need to do when &quot;merging back&quot; increases exponentially with the size of the &quot;diff&quot;:</p><img src="assets/03-the-origin-of-complexity/merge.webp" alt="Visualization of merging and coordination" style="width: 100%; max-width: 437px; height: auto;"><p>The more often we can merge back our code into master, the less coordination needs to be done. The shorter sprints we have, the easier it is to stay in sync with a changing world (the &quot;master&quot; branch).</p><h4 id="where-coordination-arises">Where coordination arises</h4><p>We mentioned that many things are constantly changing when developing software. Changes introduce the <em>need for coordination</em> which is one of the main reasons why building software is so hard.</p><p>As we can see, coordination is going on at all levels:</p><img src="assets/03-the-origin-of-complexity/where-coordination-arises.webp" alt="Visualization of where coordination arises" style="width: 100%; max-width: 568px; height: auto;"><ol><li><em>Hardware &amp; network</em> are affected by the <em>reality</em> so that they sometimes break and need to be repaired or replaced.</li><li>Concepts from <em>the world</em> become <em>models</em> in our code.</li><li><em>People</em> are affected by <em>the world</em> and the environment they live and work in.</li><li><em>People</em> leave teams/projects and new <em>people</em> appear.</li><li><em>Tools &amp; services</em> are used to manage <em>hardware &amp; network</em>. Sometimes <em>manually</em> by <em>people</em> that use <em>tools</em> and sometimes <em>automated</em>.</li><li><em>Tools</em> are used to execute or debug <em>runtime code</em>.</li><li><em>Tools &amp; services</em> are made up of <em>runtime code</em> so that they can be executed.</li><li><em>Hardware</em> is needed to execute <em>runtime code</em>.</li><li><em>Source code</em> is transformed into <em>runtime code</em>.</li><li><em>Tools</em> are used to work with <em>source code</em>.</li><li><em>Tools</em> are used by other <em>tools &amp; services</em>.</li><li><em>People</em> create <em>tools &amp; services</em>.</li><li><em>People</em> interact with other <em>people</em>.</li><li><em>Models</em> affect how the <em>source code</em> is written.</li><li><em>Tools</em> are used to create <em>models</em>.</li><li><em>Tools and services</em> are used by <em>people</em> to perform tasks: 5) manage hardware &amp; network, 6) execute or debug code, 10) work with source code, 15) create models, 16) organise people.</li></ol><p>There is a massive amount of coordination going on here. If we make a change in one place, it will often start a ripple effect of changes in other parts.</p><p>The ways in which we manage all these changes are:</p><ul><li><em>Increase usability</em></li><li><em>Automate and minimise coordination</em></li></ul><p>We have already talked about how to automate coordination and that usability affects changeability. But what we haven&apos;t mentioned yet is that we sometimes have the choice to <em>not change at all</em> or to only make <em>non-breaking changes</em>.</p><p>Here are some examples:</p><p><strong>Example 1:</strong> The original <a href="https://en.wikipedia.org/wiki/X86">Intel x86</a> instruction set is still supported, decades after it was first released.</p><p><strong>Example 2:</strong> The original bytecode instruction set for the <a href="https://en.wikipedia.org/wiki/Java_virtual_machine">Java Virtual Machine</a> is still supported.</p><p><strong>Example 3:</strong> The original <a href="https://en.wikipedia.org/wiki/Hypertext_Transfer_Protocol">HTTP</a> protocol specification is still supported, more than four decades later.</p><p>The solution is to agree on a contract, make it into a standard, and then only make backward compatible changes. Simple as that!</p><p>These standards are globally shared, but we can use the same idea within an organisation or a codebase, by e.g. saying that we always use <a href="https://en.wikipedia.org/wiki/JSON">JSON</a> when communicating between services, or that all code should run on top of the <a href="https://en.wikipedia.org/wiki/.NET_Framework">.Net</a> or the <a href="https://en.wikipedia.org/wiki/Java_virtual_machine">JVM</a> platform to ensure consistency.</p><h2 id="out-of-the-tar-pit">Out of the Tar Pit</h2><p>Before we continue, we need to mention the masterpiece <a href="http://curtclifton.net/papers/MoseleyMarks06a.pdf">Out of the Tar Pit</a> by Ben Moseley and Peter Marks. The reason is simple. It would be a crime to not include it in a blog post about <em>complexity</em> in software!</p><p>If you haven&apos;t read it already, I recommend that you do. It&apos;s well spent time!</p><p>They talk a lot about the importance of fighting complexity and where it arises.</p><p>They state that:</p><blockquote><p>Complexity is the single major difficulty in the successful development of large-scale software systems.</p></blockquote><p>They continue:</p><blockquote><p>We believe that the major contributor to this complexity in many systems is the handling of state</p></blockquote><p>With <em>state</em> they mean <em>mutable state</em>, especially <em>uncoordinated mutable state</em>. I agree that this is very much true, especially in languages that encourage use of <em>uncoordinated mutable state</em>.</p><p>The reason why <em>mutable state</em> is especially hard to deal with, is that it introduces the <em>need for coordination</em>. Sometimes this need for coordination is lacking, as in the case of <em>global variables</em>, which is why global variables are discouraged in general.</p><p>Luckily, there are ways of controlling mutable state, like the use of <a href="https://en.wikipedia.org/wiki/Transaction_processing">transactions</a>, <a href="https://clojure.org/reference/transients">transient data structures</a>, <a href="https://en.wikipedia.org/wiki/Software_transactional_memory">software transactional memory (stm)</a>, <a href="https://clojure.org/reference/atoms">atoms</a>, and more.</p><p>A common situation where mutable state can sneak in is via use of objects:</p><blockquote><p>The bottom line is that all forms of OOP rely on state (contained within objects) and in general all behaviour is affected by this state. As a result of this, OOP suffers directly from the problems associated with state described above, and as such we believe that it does not provide an adequate foundation for avoiding complexity.</p></blockquote><p>This is also why the use of <em>immutable state</em> and <em>pure functions</em> is preferred, because they don&apos;t introduce coordination by themselves.</p><p>The paper also talks about complexity caused by <em>control</em>, which is about the <em>order</em> in which things happen.</p><p>Their observation is that:</p><blockquote><p>ordering in which things will happen is controlled by the order in which the statements of the programming language are written</p></blockquote><p>The problem with this is that it adds need for coordination that is not explicitly expressed by the language with the result that the developers need to perform this coordination in their head when they read the code, which increases the risk of introducing errors in the code.</p><p>They describe it very well on page 8 and 9:</p><blockquote><p>The difficulty is that when control is an implicit part of the language (as it almost always is), then every single piece of program must be understood in that context — even when (as is often the case) the programmer may wish to say nothing about this. When a programmer is forced (through use of a language with implicit control flow) to specify the control, he or she is being forced to specify an aspect of how the system should work rather than simply what is desired. Effectively they are being forced to over-specify the problem.</p></blockquote><p>The paper discusses many other aspects of software, like identity, different kinds of programming paradigms, the relational model, and more. I think if more people understood this paper, much of the complexity that is produced in this industry could be eliminated!</p><h2 id="dependencies">Dependencies</h2><p>So why use the word <em>coordination</em> when we already have <em>dependency</em>?</p><p>The main reason is that they <em>mean different things</em>.</p><p>That&apos;s also why we can&apos;t say &quot;dependencies are bad&quot;, because it&apos;s not always the case. It&apos;s especially not true if we depend on something that never changes in a breaking way.</p><p>For example, depending on a Virtual Machine (e.g. the JVM) helps us eliminate the need for coordination between the compiled bytecode and the hardware. Depending on <code>java.lang.String</code> helps us work with strings in a safe way, without worrying about it changing in the future!</p><p>The rule of thumb is:</p><blockquote><p>Stabilise the things you depend on</p></blockquote><h2 id="coupling">Coupling</h2><p>So if we can&apos;t use <em>dependencies</em> to describe how well a system is designed, maybe we can use <em>coupling</em>?</p><p>Coupling can be described with the <a href="https://en.wikipedia.org/wiki/Connascence">connascence</a> concept, but here we will use the <a href="https://en.wikipedia.org/wiki/Coupling_(computer_programming)">Wikipedia</a> definition:</p><blockquote><p>In <a href="https://en.wikipedia.org/wiki/Software_engineering">software engineering</a>, <strong>coupling</strong> is the degree of interdependence between software modules; a measure of how closely connected two routines or modules are; the strength of the relationships between modules.</p></blockquote><div class="image-with-caption" style="max-width: 524px; margin-top: 30px;">
<img src="assets/03-the-origin-of-complexity/coupling.webp" alt="Visualization of coupling and relationships between modules">
<small class="image-caption" style="display: block; text-align: center; margin-top: 0;">https://en.wikipedia.org/wiki/File:Coupling_sketches_cropped_1.svg</small>
</div><p style="margin-top: 20px;"/><p>This illustration measures three aspects of coupling: <em>interdependency</em>, <em>coordination</em> and <em>information flow</em>. If we need three words to describe <em>coupling</em>, where <em>coordination</em> is one of them, then it&apos;s probably not the same concept as <em>coordination</em>!</p><p>An indication that the concept is not so concisely defined is the huge list of different types of coupling: <em>content coupling</em>, <em>common coupling</em>, <em>external coupling</em>, <em>control coupling</em>, <em>stamp coupling</em>, <em>data coupling</em>, <em>subclass coupling</em>, and <em>temporal coupling</em>.</p><p>The underlying mechanisms that contribute to complexity are not clearly expressed, which makes the concept of <em>loose</em> or <em>tight coupling</em> hard to use as a tool to guide us when making design decisions.</p><p>The consequence is that people often try to &quot;decouple&quot; things without decreasing the need for coordination, which unfortunately often only adds more complexity. A better approach is instead to focus on <em>reducing coordination</em> and <em>increasing usability</em> as a way to fight complexity.</p><h2 id="tradeoffs">Tradeoffs</h2><p>Sometimes you may have to chose between a <em>usable</em> solution that introduces <em>coordination</em> and a solution that does the opposite.</p><p>Let&apos;s assume you need to choose between introducing duplications in a text file, or using a <a href="https://en.wikipedia.org/wiki/Template_processor">template engine</a>:</p><img src="assets/03-the-origin-of-complexity/tradeoffs.webp" alt="Visualization of tradeoffs between solutions" style="width: 100%; max-width: 530px; height: auto;"><p>To store the content as <em>plain text</em> keeps it readable and search-able, but with the extra cost of remembering to update the file whenever the duplicated content changes.</p><p>Introducing a <em>template engine</em> will solve the <em>coordination</em> of the otherwise duplicated content, but will also add complexity and maybe reduce readability and search-ability.</p><p>What solution to choose should be based on how often the duplicated data changes, the risk of forgetting to update the file and how big an impact that may have compared to the cost of introducing a template engine.</p><p>Most often though, a reduction in <em>coordination</em> also has a positive effect on the <em>usability</em>:</p><img src="assets/03-the-origin-of-complexity/changeability.webp" alt="Visualization of changeability and coordination vs usability" style="width: 100%; max-width: 530px; height: auto;"><p>That includes reducing the <em>size</em>, removing <em>duplication</em>, separating <em>what</em> from <em>how</em>, keeping things <em>consistent</em>, and more.</p><h2 id="summary">Summary</h2><p>This diagram summarises what we have talked about:</p><img src="assets/03-the-origin-of-complexity/summary.webp" alt="Summary diagram of coordination and usability" style="width: 100%; max-width: 823px; height: auto;"><p>This diagram will help you develop the <em>thing right</em> but not the <em>right thing</em>. That part you have to figure out yourself!</p><p>The goal is to give you a tool that guides you towards simpler solutions with increased quality in a way that allows you to work fast, have more fun and spend less money!</p><p>So don&apos;t hesitate to use dm the next time you need to make a design decision!</p><h2 id="choice-of-programming-language">Choice of programming language</h2><p>Our most important tool in our toolkit is the <em>programming language</em>. People often say that it doesn&apos;t matter what programming language we choose, because we can solve any problem regardless of choice of language, as long as it&apos;s fast enough and <a href="https://en.wikipedia.org/wiki/Turing_completeness">Turing complete</a>.</p><p>This is as wrong as saying that it doesn&apos;t matter how skilled the players in a football team are. It may be a poor comparison, but programming languages also need &quot;skills&quot; to perform well!</p><p>Sometimes the speed of the language or how fast it compiles is the most important skill, but most often it&apos;s just about how well it&apos;s suited to fight complexity.</p><p>When we make our choice of language, we should pick one that ticks as many boxes in the <em>Simplicity</em> column as possible:</p><img src="assets/03-the-origin-of-complexity/whats-in-your-toolkit.webp" alt="What's in your toolkit diagram" style="width: 100%; max-width: 686px; height: auto;"><p>If this diagram looks familiar to you, then it&apos;s because it&apos;s taken from the brilliant talk <a href="https://www.infoq.com/presentations/Simple-Made-Easy/">Simple Made Easy</a> by <a href="https://github.com/tallesl/Rich-Hickey-fanclub">Rich Hickey</a>.</p><p>Don&apos;t forget that the choice of programming language is not just a matter of taste, it&apos;s an opportunity to choose the best tool for the job to fight complexity.</p><p>If your favourite language doesn&apos;t tick that many boxes, then it can be an idea to look around and see if you can find <a href="https://clojure.org/">one that does</a>!</p><p>Let the war against complexity begin.</p><p>Happy coding!</p><hr /></div>]]></content>
  </entry>
  <entry>
    <id>https://tengstrand.github.io/blog/2018-10-02-how-polylith-came-to-life.html</id>
    <link href="https://tengstrand.github.io/blog/2018-10-02-how-polylith-came-to-life.html"/>
    <title>How Polylith came to life</title>
    <updated>2018-10-02T23:59:59+00:00</updated>
    <content type="html"><![CDATA[<div><img src="assets/02-how-polylith-came-to-life/polylith-text-and-logo.webp" alt="Polylith architecture logo" style="width: 400px; max-width: 100%; display: block; margin: 10px 0;" /><p>Today I&apos;m proud to announce a new software architecture, called Polylith!<sup id="fnref:1"><a href="#fn:1" class="footnote-ref">1</a></sup></p><p>I hope that Polylith can have a positive affect on the software industry, by focusing on simplicity and developer happiness and efficiency.</p><!-- end-of-preview --><p>Let’s start from the beginning. Two years ago I finally had the chance to work full time with the functional language <a href="https://en.wikipedia.org/wiki/Clojure">Clojure</a> and the functional database <a href="https://www.datomic.com/">Datomic</a>. I had read a book, blogged and played around with the language for a while, but now it was time to leave 20 years of Java behind me.</p><p>I joined a small team with one developer, a team leader and a UX designer. Even though only the team leader and I had any previous experience with Clojure and very little experience with Datomic, the whole team was up and running quickly and very soon became a hyper productive Dream Team!</p><p>A fantastic thing about Clojure is its <a href="https://en.wikipedia.org/wiki/Read%E2%80%93eval%E2%80%93print_loop">REPL</a>. It allows you to work much faster compared to “up front” compiled languages like Java. Instead, it compiles the code incrementally. The result is lightning fast feedback, where you have direct access to all your data and compiled code. Once you have tried it, you will never look back!</p><p>After a month I questioned why we still had a Microservices architecture. It slowed us down because we now had a bunch of <a href="https://en.wikipedia.org/wiki/Read%E2%80%93eval%E2%80%93print_loop">REPL</a>s instead of just one, and it also added a lot of boilerplate code and unnecessary complexity.</p><p>One morning on the train to work I got that eureka moment that you may get once in a lifetime. I realised that the solution was to turn the development environment into a monolith using <a href="https://en.wikipedia.org/wiki/Symbolic_link">symbolic links</a><sup id="fnref:2"><a href="#fn:2" class="footnote-ref">2</a></sup> to each &quot;component&quot;! This little trick worked out well and now we had our single REPL back again!</p><div class="image-with-caption" style="max-width: 600px;">
<img src="assets/02-how-polylith-came-to-life/polylith-building-blocks.webp" alt="The three building blocks of Polylith">
<small class="image-caption" style="display: block; text-align: center; margin-top: 0;">The three building blocks of Polylith</small>
</div><p style="margin-top: 30px;"/><p>Two years have passed and we still love this way of designing systems. The components have become our friends that are easy to understand, reuse and combine into deployable systems. The <a href="https://github.com/polyfy/polylith">tool</a> helps us test and build our systems incrementally both locally and on the continuous integration server.</p><p>It’s not just efficient and fun, it has changed the way we think about design at the system level.</p><p>If this has made you curious, then head over to our <a href="https://polylith.gitbook.io/">high-level documentation</a> to find out more.</p><p>Happy coding!</p><p>Joakim Tengstrand</p><div class="footnotes">
<ol>
<li id="fn:1">
<p>
The predecessor to Polylith was called <a href="01-the-micro-monolith-architecture.html">Micro Monolith</a>, and if you look closely you will also notice that the logo has changed since this was posted: <img src="assets/02-how-polylith-came-to-life/polylith-logo.png" alt="Polylith logo" style="width: 24px; height: 24px; vertical-align: middle; display: inline-block; margin: 0 2px;">
<a href="#fnref:1" class="footnote-backref">↩</a>
</p>
</li>
<li id="fn:2">
<p>
Since October 2020, the new <a href="https://cljdoc.org/d/polylith/clj-poly/CURRENT">poly command line tool</a> uses <a href="https://clojure.org/guides/deps_and_cli">tools.deps</a> instead of <a href="https://en.wikipedia.org/wiki/Symbolic_link">symbolic links</a>.
<a href="#fnref:2" class="footnote-backref">↩</a>
</p>
</li>
</ol>
</div></div>]]></content>
  </entry>
  <entry>
    <id>https://tengstrand.github.io/blog/2016-12-28-the-micro-monolith-architecture.html</id>
    <link href="https://tengstrand.github.io/blog/2016-12-28-the-micro-monolith-architecture.html"/>
    <title>The Micro Monolith Architecture</title>
    <updated>2016-12-28T23:59:59+00:00</updated>
    <content type="html"><![CDATA[<div><blockquote style="border-left: 4px solid darkred; color: darkred; margin-left: 0; padding-left: 20px; font-style: italic;">
Note: 
The Micro Monolith architecture has been replaced by the <a href="https://polylith.gitbook.io/polylith/">Polylith</a> architecture, which has abandoned symbolic links and dependency injection in favor of simple configuration.
</blockquote><img src="assets/01-the-micro-monolith-architecture/monolith.webp" alt="Micro Monolith Architecture" style="width: 100%; max-width: 600px; height: auto; display: block; margin: 20px 0;"><p>Writing quality software, with thousands or millions of lines of code, is probably one of the most challenging and complex tasks you can undertake. Here I will present an alternative, amazingly simple way of modularising software, complete with <a href="https://github.com/tengstrand/micromonolith">code examples</a> in Java and Clojure!</p><!-- end-of-preview --><p>When a system grows it will eventually reach a point when it becomes hard to manage as a single <a href="https://en.wikipedia.org/wiki/Monolithic_application">monolith</a>. For every line of code that is added, the system becomes harder to understand, change and reuse. <a href="https://en.wikipedia.org/wiki/Microservices">Microservices</a> try to address these problems but also bring extra complexity and an increased cost of integration.</p><p>The core principle in the <em>Micro Monolith</em><sup id="fnref:1"><a href="#fn:1" class="footnote-ref">1</a></sup> architecture is to keep the hardware, software and the data <em>close together</em> in <em>one place</em>. By doing so we can simplify things and get rid of unnecessary coordination. The performance will also be improved if we have direct access to the data from <em>one place</em>. If we design our systems using small, isolated, and composable building blocks (like Microservices) but execute them from <em>one place</em> (like a monolith), we get the best of both worlds.</p><h2 id="how-it-works">How it works</h2><p>Each service is stored as a project in the version control system, with the ability to build its own <a href="https://en.wikipedia.org/wiki/JAR_%28file_format%29">JAR</a> (if running on the <a href="https://en.wikipedia.org/wiki/Java_virtual_machine">JVM</a> — or similar on other platforms). They become the building blocks in the production environment that we use to compose our systems. In the <em>development</em> project we link all the source code from the services, so that we can work directly with the code as if it was a single project.</p><p>Let’s continue by summarising the pros and cons of the Micro Monolith approach:</p><h2 id="pros">Pros</h2><ul><li><em>simplicity</em> — separation of concerns, but with direct code calling, which removes the complexity of networked APIs</li><li><em>excellent performance</em> — no network calls to access services</li><li><em>modular</em> and <em>composable</em> services — reuse across multiple systems</li><li><em>data consistency</em> via <em>cross-service transactions</em> — instead of eventual consistency</li><li><em>reduced devops and hardware/hosting costs</em> — run the system on a single machine</li><li><em>easy to test</em> — the whole system can be tested as one piece</li><li>a <em>faster</em> and <em>more effective development experience</em> — navigate, refactor and debug across services + make changes without rebuilding services</li></ul><h2 id="cons">Cons</h2><ul><li>you “must” use the same programming language in all services (*)</li><li>the development project requires some extra setup (creating the symbolic links)</li><li>your operating system has to support symbolic links<sup id="fnref:2"><a href="#fn:2" class="footnote-ref">2</a></sup></li><li>resources that share the same path must have unique names across all services (if they have different content)</li><li>you lose the built-in version control support in your IDE (because Micro Monolith is probably not supported by your IDE — yet!)<sup id="fnref:3"><a href="#fn:3" class="footnote-ref">3</a></sup></li></ul><p>(*) You are not forced to use only one programming language, but to achieve all the benefits you get from the development setup (like refactoring and debugging across services) then by far the best option is to stick with one language. The second best is to use a mix of languages that can run on the same platform (e.g. the <a href="https://en.wikipedia.org/wiki/Java_virtual_machine">JVM</a>) like Java, Scala, JRuby and Clojure (and C if using the native interface <a href="https://en.wikipedia.org/wiki/Java_Native_Interface">JNI</a>), but then you also need to build a new <a href="https://en.wikipedia.org/wiki/JAR_(file_format)">JAR</a> every time you make a change in a service so that it can be shared to other services. You always have the option to write some of the services as Microservices, but then you lose the benefits that come with the Micro Monolith architecture for these services.</p><p>We have talked about the concepts behind the Micro Monolith approach but not so much about how it works in practice, so let’s do that by showing two code examples in <a href="https://en.wikipedia.org/wiki/Java_(programming_language)">Java</a> and <a href="https://en.wikipedia.org/wiki/Clojure">Clojure</a>. All the code examples can be found <a href="https://github.com/tengstrand/micromonolith">here</a>.<br> Note: in a real system, they would have been stored in separate repositories, isolated from each other, but for convenience they are here stored in a single repository.</p><p>The Java and the Clojure examples implement the same “solution”, a fake REST API that orchestrates a number of services and exposes <em>findAddresses</em>, <em>doUserStuff</em>, and <em>doMoreUserStuff</em>.</p><h2 id="java-—-code-examples">Java — code examples</h2><p>Java is a popular language that we will use to show how the Micro Monolith architecture can look like in an object oriented language.</p><p>The <a href="https://github.com/tengstrand/micromonolith/tree/master/java/development">development</a> project is the place where you will spend most of your time as a developer. Even though all our services are stored as separate version controlled projects (<a href="https://sv.wikipedia.org/wiki/Git">Git</a> in our case) we use a clever trick to bring all the source code together into a single project (<em>one place</em>) by using <a href="https://en.wikipedia.org/wiki/Symbolic_link">symbolic links</a><sup id="fnref:2"><a href="#fn:2" class="footnote-ref">2</a></sup>. The IDE doesn’t care if the directories are “real” or just links, but will mark them with an arrow in the IDE (at least in the one <a href="https://www.jetbrains.com/idea">we use</a> in this example):</p><img src="assets/01-the-micro-monolith-architecture/development.webp" alt="Development project structure" style="width: 100%; max-width: 480px; height: auto; display: block; margin: 20px 0;"><p>After the project has been checked out locally, the links will work out of the box in Linux or Unix, but on other platforms you might need to create the development project manually with a script similar to <a href="https://github.com/tengstrand/micromonolith/blob/master/java/development/setup.sh">this</a>.</p><p>With this project setup we achieve all the benefits we normally get from a modern development environment, even <em>across services</em>. That includes <em>debugging</em>, <em>refactoring</em>, and <em>searching</em>. This is very powerful and time saving. We don’t need to rebuild services every time we change the code which makes the workflow very efficient and joyful!</p><h2 id="dependencies">Dependencies</h2><p>When designing the system we need to decide if we allow services to have knowledge about concrete implementations of external libraries or not. In this example we allow that. As a result of that decision, it’s a good idea to use the same version of libraries across all services.</p><p>The other option is to integrate internal services with external libraries by adding interfaces between them. So instead of allowing a service to know about a concrete library like <em>log4j-1.2.17.jar</em>, we instead create the interface <em>log4j-api</em> that the <em>orchestrator</em> service injects<sup id="fnref:2"><a href="#fn:2" class="footnote-ref">2</a></sup> into the services that need it.</p><h2 id="the-orchestrator-service">The orchestrator service</h2><p>The orchestrator service is the place where we put the services together. A system can have more than one orchestrator service, but in this example we only have the <a href="https://github.com/tengstrand/micromonolith/blob/master/java/rest/src/main/java/micromonolith/rest/RestService.java">RestService</a>. Its dependencies to <em>address</em>, <em>email</em>, and <em>user</em> services are specified in <a href="https://github.com/tengstrand/micromonolith/blob/master/java/rest/pom.xml">pom.xml</a>.</p><p>If service <em>A</em> needs to call function <em>f</em> in service <em>B</em>, then function <em>f</em> is injected<sup id="fnref:2"><a href="#fn:2" class="footnote-ref">2</a></sup> into <em>A</em> by the orchestrator service. It’s not mandatory to only inject one function at a time, but it will increase the <em>changeability</em> and the <em>testability</em> by making the services less coupled to each other. We will use the term <em>micro injection</em> when referring to the concept of injecting one function at a time.</p><h2 id="testing">Testing</h2><p>The Micro Monolith architecture encourages testing by making it both simple and easy. Just as with Microservices, it’s easier to test every service in isolation. An advantage compared to Microservices is that it is simpler to test the whole system because it is deployed as a single piece on one machine (our <a href="https://github.com/tengstrand/micromonolith/blob/master/java/rest/src/main/java/micromonolith/rest/RestService.java">REST API</a> in this example).</p><p>This example includes a <em>test data generator</em> that help us set up the database in a known state. You may have a <em>user</em> table with a relationship to the <em>address</em> table. You then may have a <em>UserService</em> and an <em>AddressService</em>. The <a href="https://github.com/tengstrand/micromonolith/tree/master/java/test-data-generator">test-data-generator</a> lets you easily set up a known state of the database, which facilitates the writing of integration tests. This can be done both within a service and across services, for example <a href="https://github.com/tengstrand/micromonolith/blob/master/java/address/src/test/java/micromonolith/address/AddressServiceTest.java">AddressServiceTest</a> and <a href="https://github.com/tengstrand/micromonolith/blob/master/java/user/src/test/java/micromonolith/user/UserServiceTest.java">UserServiceTest</a>.</p><h2 id="clojure-—-code-examples">Clojure — code examples</h2><p><a href="https://en.wikipedia.org/wiki/Clojure">Clojure</a> is a powerful functional language that runs on top of the <a href="https://en.wikipedia.org/wiki/Java_virtual_machine">JVM</a>. We will use Clojure to show how the Micro Monolith architecture can look like in a functional language. All Clojure code can be found <a href="https://github.com/tengstrand/micromonolith/tree/master/clojure">here</a>.</p><p>The <em>development</em> project looks like this:</p><img src="assets/01-the-micro-monolith-architecture/development.webp" alt="Development project structure" style="width: 100%; max-width: 480px; height: auto; display: block; margin: 20px 0;"><p>The Clojure version has basically the same structure as the Java version but the functions are stored in namespaces instead of classes. We also don’t need the extra API layer for the address and the email service that we have in Java. As a bonus the Clojure version is less verbose and can do the same job in about 200 lines of code compared to 400 in Java.</p><p>The micro injection is simpler in Clojure and we use the <a href="https://github.com/tengstrand/micromonolith/blob/master/clojure/injection/src/injection/core.clj">inject</a> macro to inject functions. In the example, the function <a href="https://github.com/tengstrand/micromonolith/blob/master/clojure/email/src/email/service.clj">email/send-pdf-email!</a> replaces <a href="https://github.com/tengstrand/micromonolith/blob/master/clojure/user/src/user/service.clj">user.service/send-pdf-email!</a> at line 8 in namespace <a href="https://github.com/tengstrand/micromonolith/blob/master/clojure/rest/src/rest/service.clj">rest.service</a>.</p><h1 id="practical-experience">Practical experience</h1><p>I and the team I work with have used the Micro Monolith architecture in a real production system for a while. We started with a Microservices architecture, where every service had its own repository in Git. The transition to Micro Monolith was very smooth and all we had to do was to <strong>throw away about 30% of the code</strong> in all our services and replace all REST service calls with simple function calls. It was not only the REST parts that disappeared, but also a lot of complexity related to state and error handling.</p><p>In the beginning, the development environment had the same setup as the production environment, where every service was represented as a Java archive (JAR-file). Every time we changed a service, we also had to rebuild the JAR, so that it could be used by other services. Another downside was that we had to restart the <a href="https://en.wikipedia.org/wiki/Read%E2%80%93eval%E2%80%93print_loop">REPL</a> (yes, we use Clojure!). That was time consuming and took away some of the joy of working in a REPL.</p><p>I then came up with the new setup for the development project. After that change we could start the REPL once and then continue working without being interrupted, resulting in happier developers! Another thing we realised was that we had some dead code in our services, marked in grey, that we now could get rid of.</p><p>Another design choice was to use the <a href="http://www.datomic.com/">Datomic</a> database. It fits really well with the Micro Monolith architecture and is both simple and powerful. You can read more about its architecture <a href="http://docs.datomic.com/architecture.html">here</a>.</p><p>We use a test-data-generator from almost every service to simplify setting up integration tests. Some of the naming of variables and functions in that service could be improved. Before the change, we had to manually search and replace occurrences in all our services which was both time-consuming and error-prone. The result was that we avoided to make these small changes. With the new development project we can take advantage of the refactoring support in the IDE to rename variables and functions in a wink!</p><h2 id="summary">Summary</h2><p>The Micro Monolith presents a simpler model of how to build systems. It competes with the Microservice architecture but it doesn’t completely replace it, since the latter definitely has its place. Feel free to use them both if you have the need.</p><p>If you care about simplicity and composability when building systems, then you should definitely give the Micro Monolith architecture a try. Enjoy the efficiency of the development setup and the simplicity of the test and production environment.</p><p>Happy coding!</p><div class="footnotes">
<ol>
<li id="fn:1">
<p>
In 2017 I gave it the new name <a href="https://polylith.gitbook.io/polylith/">Polylith</a>.
<a href="#fnref:1" class="footnote-backref">↩</a>
</p>
</li>
<li id="fn:2">
<p>
Since October 2020, the new <a href="https://cljdoc.org/d/polylith/clj-poly/CURRENT">poly command line tool</a> uses <a href="https://clojure.org/guides/deps_and_cli">tools.deps</a> instead of <a href="https://en.wikipedia.org/wiki/Symbolic_link">symbolic links</a>.
<a href="#fnref:2" class="footnote-backref">↩</a>
</p>
</li>
<li id="fn:3">
<p>
Today, IDE support is excellent in Clojure, such as <a href="https://cursive-ide.com/userguide/polylith.html">Cursive</a> and <a href="https://calva.io/polylith/">Calva</a>, but there is also support in <a href="https://davidvujic.github.io/python-polylith-docs/">Python</a>.
<a href="#fnref:3" class="footnote-backref">↩</a>
</p>
</li>
</ol>
</div></div>]]></content>
  </entry>
</feed>